¶ Introduction
¶ Purpose, Objective and Scope
This document provides a detailed Manufacturing Procedure (MAP) for the carbon fiber layup and infusion process of diverse parts as the aerocover, the airframe, and the nosecone. It is intended to ensure consistency, repeatability, and high-quality results in the fabrication process.
¶ Purpose
The purpose of this document is to outline the step-by-step manufacturing procedure for draping and infusing carbon fiber onto the flight parts using vacuum infusion. This process ensures a lightweight, strong, and aerodynamically efficient component suitable for the rocket assembly.
¶ Objective
The primary objective of this document is to provide clear guidance to technicians and team members involved in the manufacturing process. By following this procedure, readers will:
- Understand the necessary materials, tools, and equipment.
- Learn the correct sequence of operations to ensure a successful infusion.
- Identify potential challenges and best practices to avoid defects.
- Ensure repeatability for future manufacturing runs.
¶ Scope
This document covers the preparation, layup, and vacuum infusion process of the composite parts, from mold preparation to the final curing stage. It includes:
- Material selection and preparation
- Mold preparation and release agent application
- Layup process and fiber orientation
- Vacuum bagging and infusion setup
- Resin infusion and curing process
- Demolding and quality control
This document does not cover:
- The design and structural analysis of the composite parts.
- Post-processing steps such as trimming, finishing, and surface treatments.
- Any modifications to the infusion process beyond the standard procedure outlined here.
By following this document, users will gain a structured approach to fabricating high-quality composite parts while minimizing defects and ensuring process efficiency.
¶ Applicable and Reference Documents
Rajouter les MAP spécifiques à l'airframe, l'aerocover et le nosecone.
¶ Mold Preparation
¶ Pre-Operations Checklist
¶ Participants
| Check | Responsible for: | who? |
|---|---|---|
| Equipment Checklist | Team Members | |
| Safety | Stephan(SKIL) | |
| Documenting/Reporting | Team Member | |
| Preparing the operations on-site | Team Members | |
| Consiler | Gavin (LPAC) |
¶ Raw Material / Tools
| Check | Item | Article Numb. | Qty |
|---|---|---|---|
| MDF for Mold | X | X | |
| Wood Glue (Big) | X | 1 | |
| Serrated Spatula | X | 1 | |
| Drill | X | 1 | |
| CNC (10mm flat) | X | 1 | |
| Screws M4 | X | X | |
| Logiciel Fusion | X | 1 | |
| Protection Glasses | X | X | |
| Vacuum film tube 170°C per running meter | 450.015 | X | |
| MDF Support | X | 1 | |
| Clamps | X | X | |
| Sanding Paper or device | X | 1 | |
| Work pack Epoxy GL-1 | 104.0951 | 1 | |
| Teflon/Glas 240°C 75my 130g/m² SK 100cm per m | 5011.013 | 1 | |
| Brushes | X | 1 | |
| PP mixing Bucket | 200.2881 | 1 |
¶ Technical drawings
To generate the G-code files for your mold, you first need to consider several key parameters:
- The mold must have sufficiently large edges to avoid stress concentrations in the MDF and to allow space for placing consumables later. It’s recommended to add at least 60 mm on each side.
- Ensure there is a minimum of approximately 15 mm between the bottom of the mold and the base of your stock material.
- The mold will define the outer shape of your part. If you need the inner diameter, a simple rule for carbon fiber at 100 g/m² is: 1 layer = 0.1 mm thickness.
- Remember to add extra material in the first MDF layer so you can nail it to the CNC table.
¶ Assembly of the MDF plates
¶ Design your MDF assembly
Use fusion and follow the simple steps to design the raw cut out of your MDF
If you have a simple 2D design (like a half cilinder) :
- Cut the height of your 3D design into simple MDF plates (19mm, 16mm, ...).
- If it arranges you, take into account the thiccness of the glue (~0.5mm for 5 plates).
- Take the raw shape and extend rectangles out of it with a relatively high margin that represent the different MDF plates.
- Show the design to a SKIL coach to verify it and launch production
If you have a complex 3D design (like the nosecone) :
- Cut the height of your 3D design into simple MDF plates (19mm, 16mm, ...).
- If it arranges you, take into account the thiccness of the glue (~0.5mm for 5 plates).
- Make a complex 3D analysis to determine the shape of your cutouts
- Show the design to a SKIL coach to verify it and launch production
Think about structural integrity of your mold
¶ Produce your MDF raw cutout
Ask SKIL coaches for authorisation to take the MDF plates
For simple 2D design:
- Cut out the rectangular MDF plates with a circular drill
- Glue all your plates together, starting by the bottom plate
- Try to align one coner and one face of the mold while gluing
- Use clamps to compress your plates and let it dry overnight
For complex 3D design
- Draw the cutout shapes onto the MDF plates with a laser machin Do not cut, just draw (don't forget to add at least 7-8mm of margin )
You can also draw crosses and then drill holes in the MDF to align the pins.
- Cut out the shape by taking a bit of margin (2mm-5mm in general)
- Align the plates carrefully by using pins and drilling holes at the cross locations
( don't forget to make several hole locations to vary where the pins are located between each 2 plates) - Glue all your plates together, starting by the bottom plate
- Use clamps to compress your plates and let it dry overnight
Be careful with these two points:
Wood glue polymerize very quickly, so you need to spread it quickly and glue the boards.
When using clamps, the boards generally move slightly. Make sure that once tightened,they are properly aligned.
¶ Configuration of the CNC
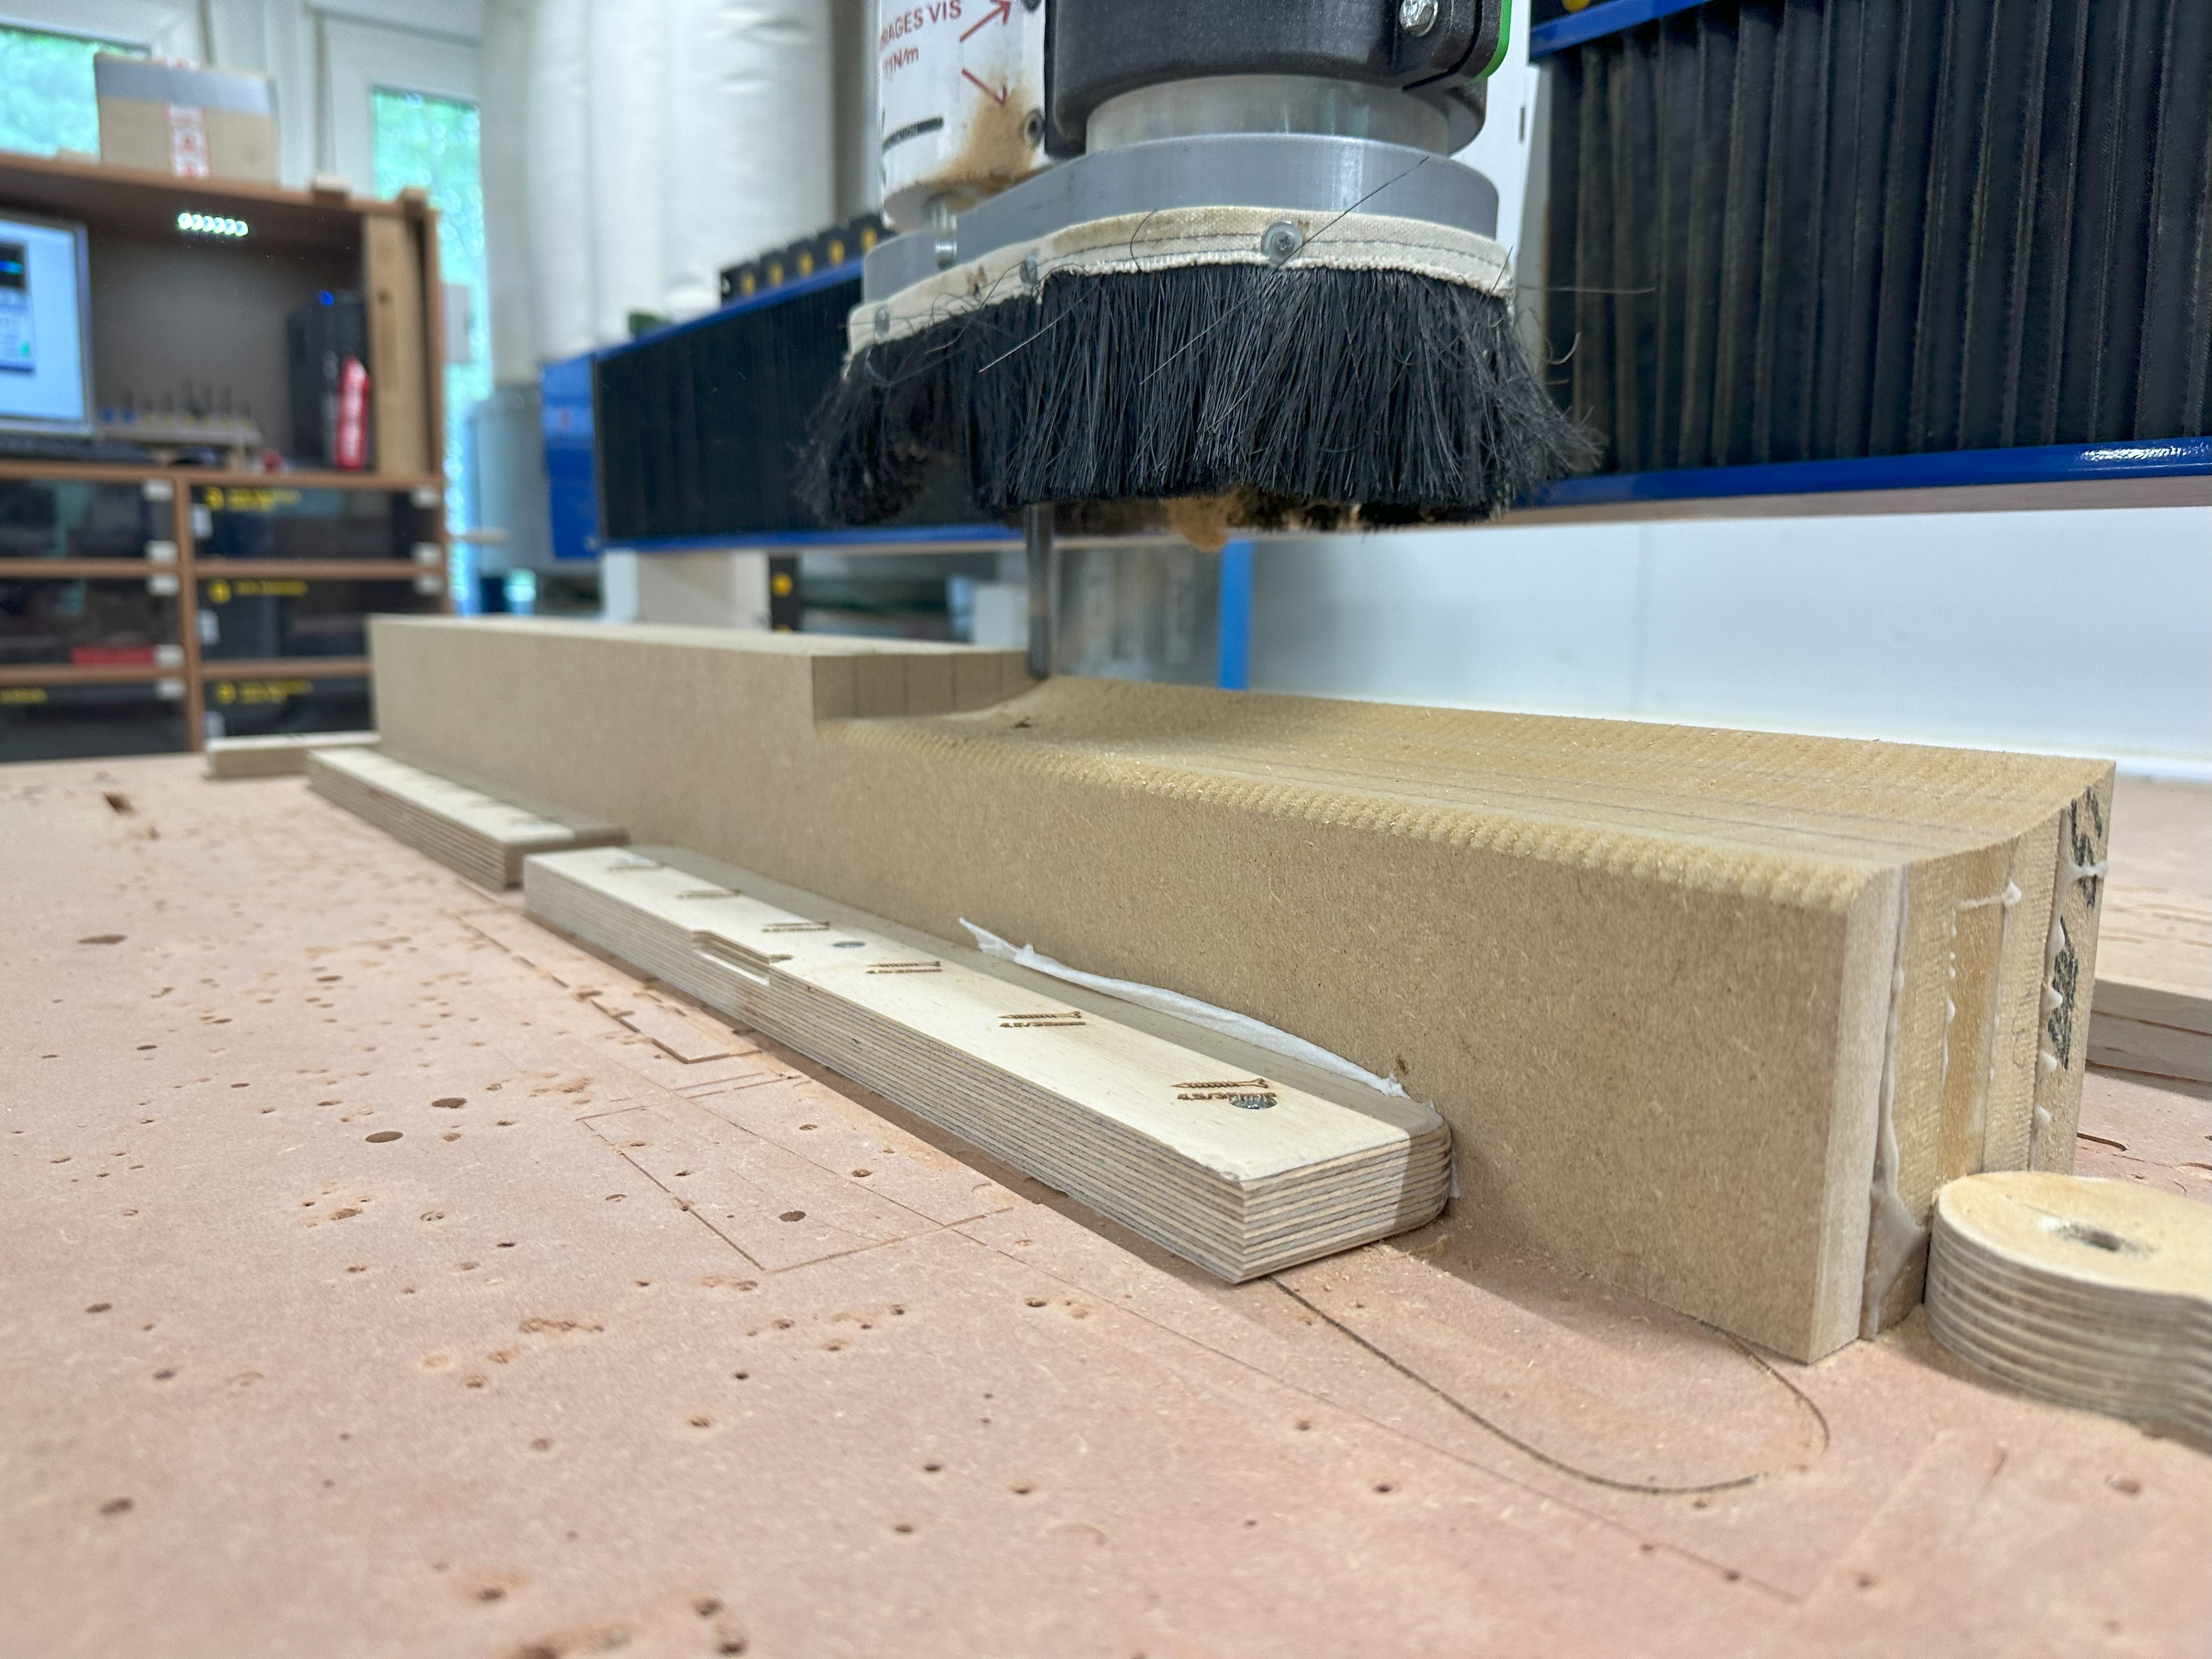
- Be verry carefull when aligning the raw cutout of the mold onto the CNC, this step is critical
- Configurate the height of the tool with the 4 screws at 11 [N*M],
- Insert the tool after choosing the correct CNC pliers.
- Start the machine and the ventilation,
- Click on RESET on the application Mach3Mill app.
- (Tips : set Spindle to 2000 to start the CNC to hear the sound for placing the origin)
- Place the zero in each axis by touching the turning tool on the edges of the MDF (press MDG to slow down)
Remember to add the radius of the tool in each axis to be sure the tool axis is the reference.
- If you want to check the origin you can put the following command :
f1000 y0 x0- If you want to moove it to (x=5; y=5) :
f1000 y5 x5- ** Be careful to put Z high enough**
Don't be a Hero -> wait for Stephan to Check all the setup after configuration before starting the CNC
¶ Post Conditions
| Check | Step | Description |
|---|---|---|
| 1 | Check everything is well fixed. | |
| 2 | Confirm proper curing (hardness, rigidity). | |
| 3 | Ensure surface quality, no visible defects. | |
| 4 | Verify dimensions match specifications. | |
| 5 | Ensure clean demolding without damage. |
¶ Procedure Body
| Check | Step description | Tools & Materials involved |
|---|---|---|
| Draw the aerocover mold CAD on Solidworks and then, import it in Fusion360 as step. Go to "Fabrication - Milling ", click on "Pose" and dimensionate the brut. | SW / Fusion | |
| Configure the "Adaptive Hollowing" function (hollowing step) and the "Parallel" function (finishing step) in the 3D tab. Export the Gcode with Post Process. | Fusion | |
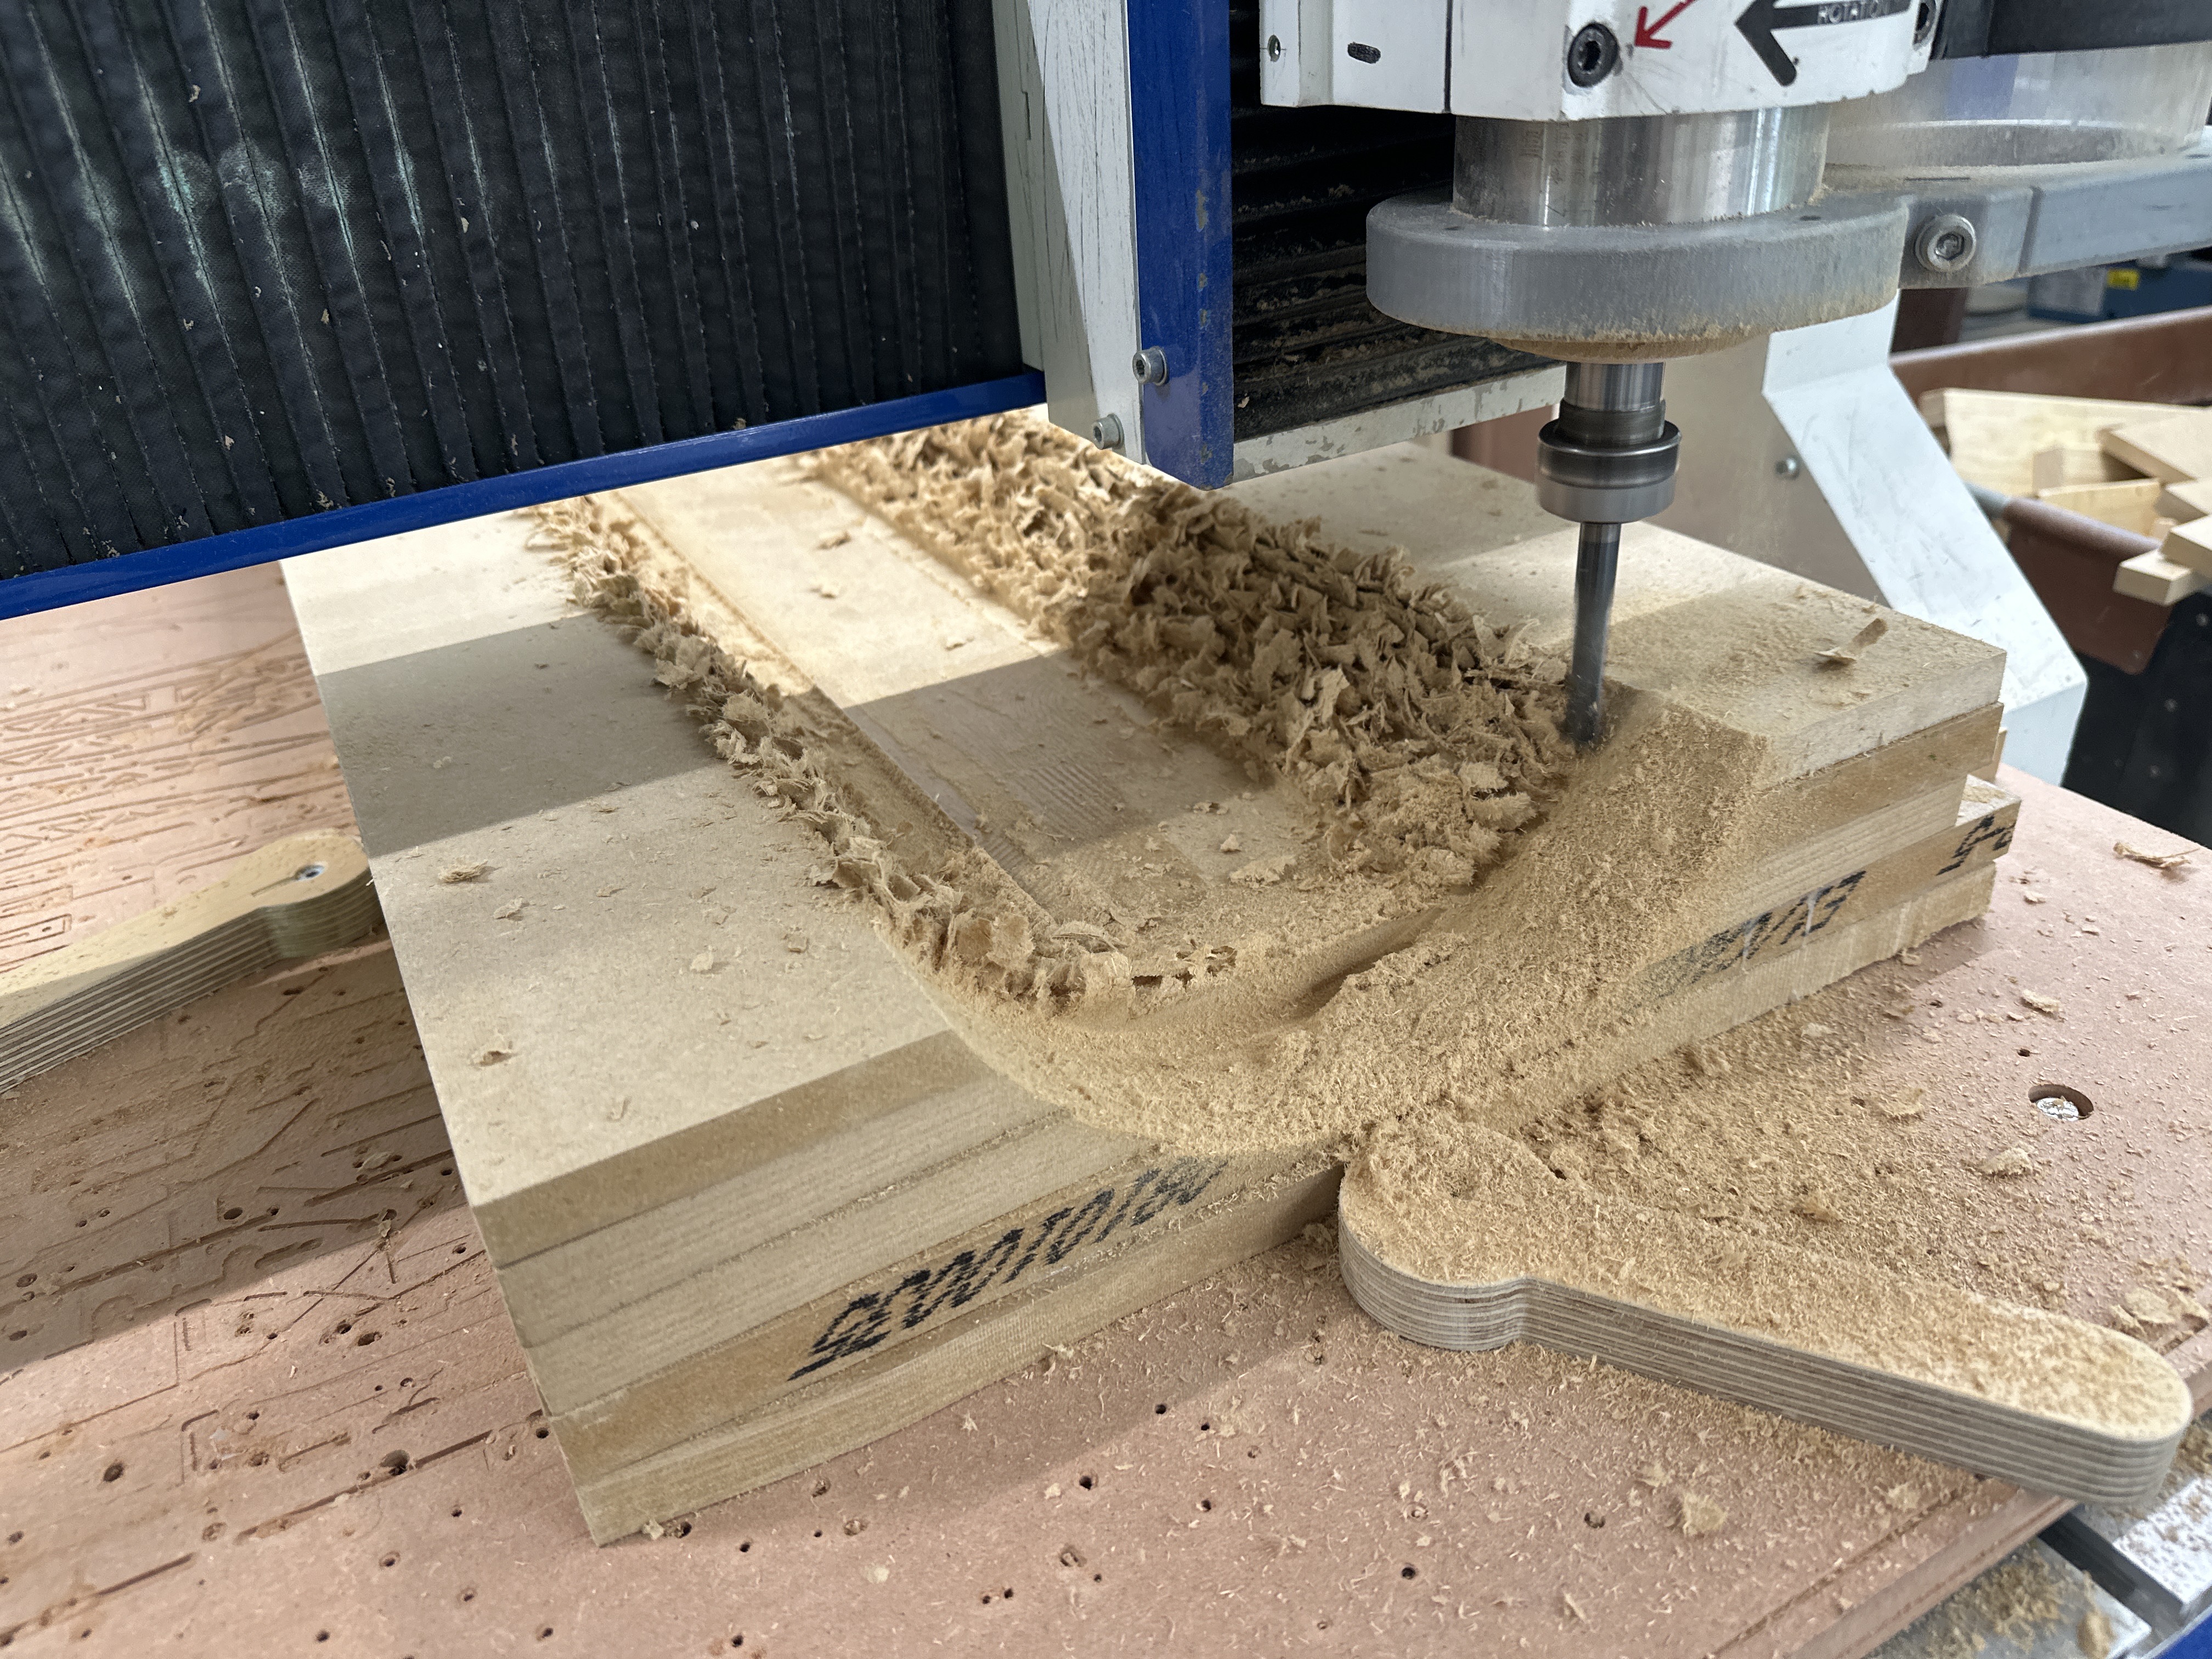
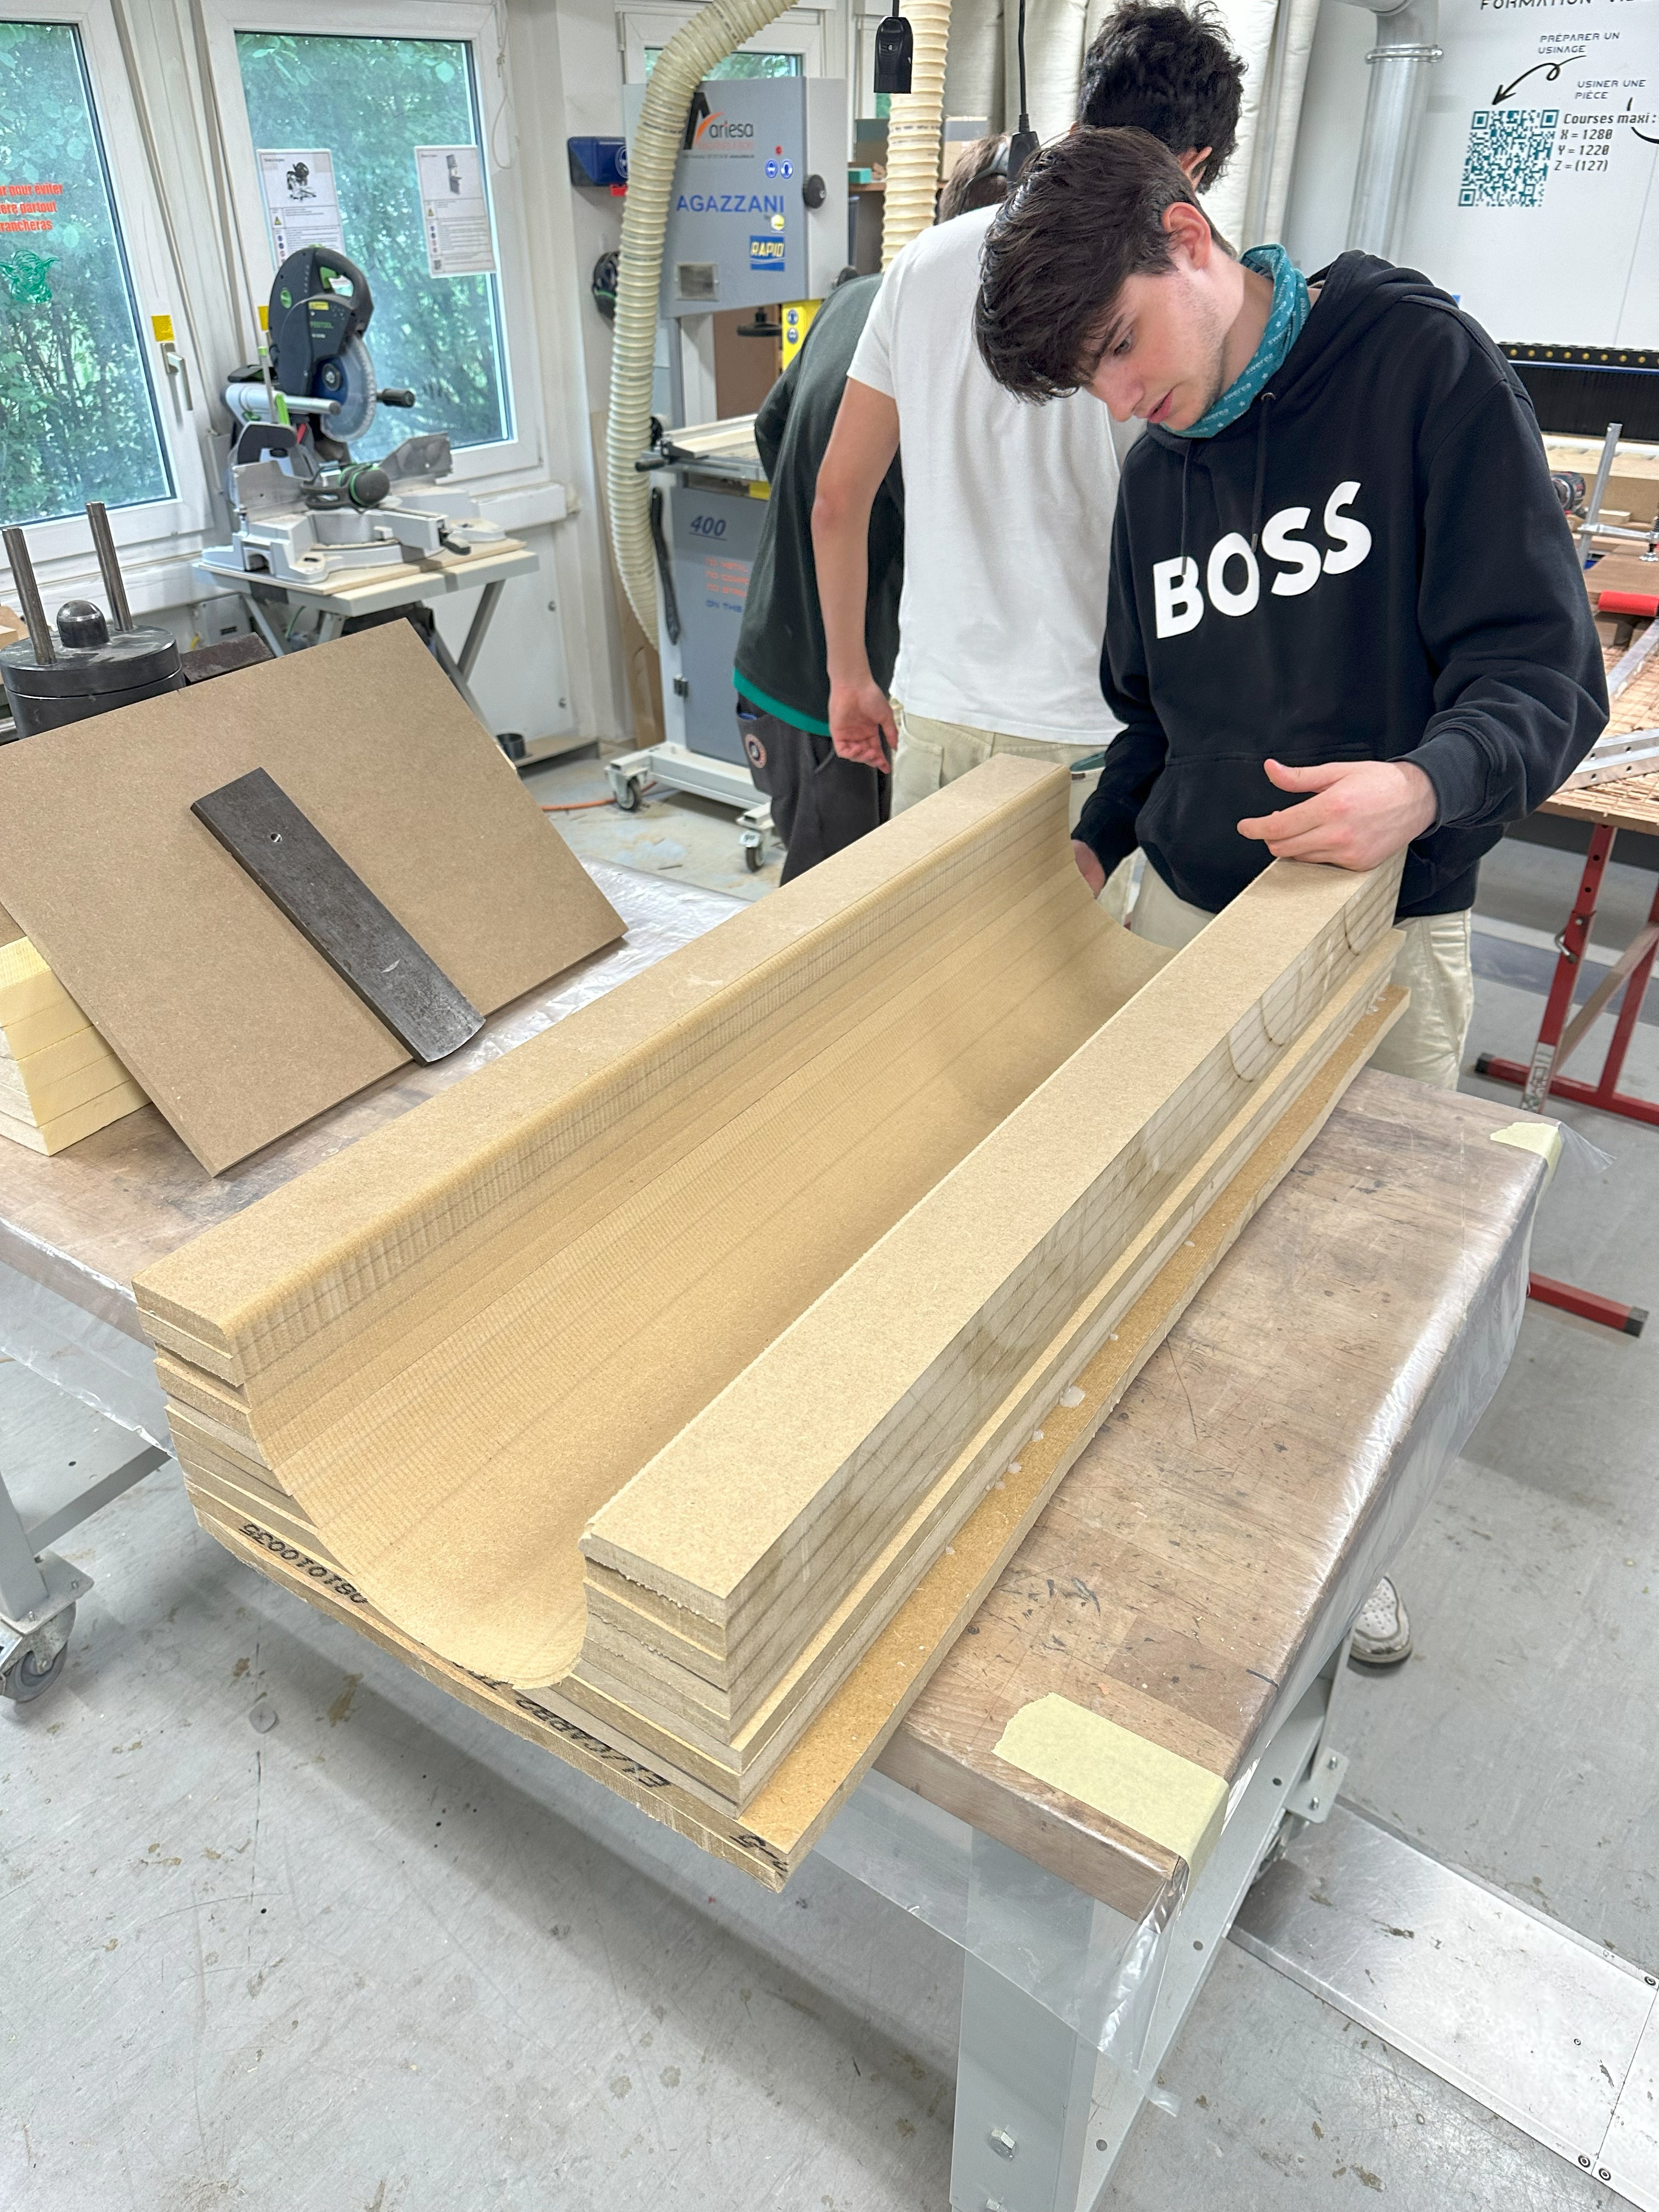
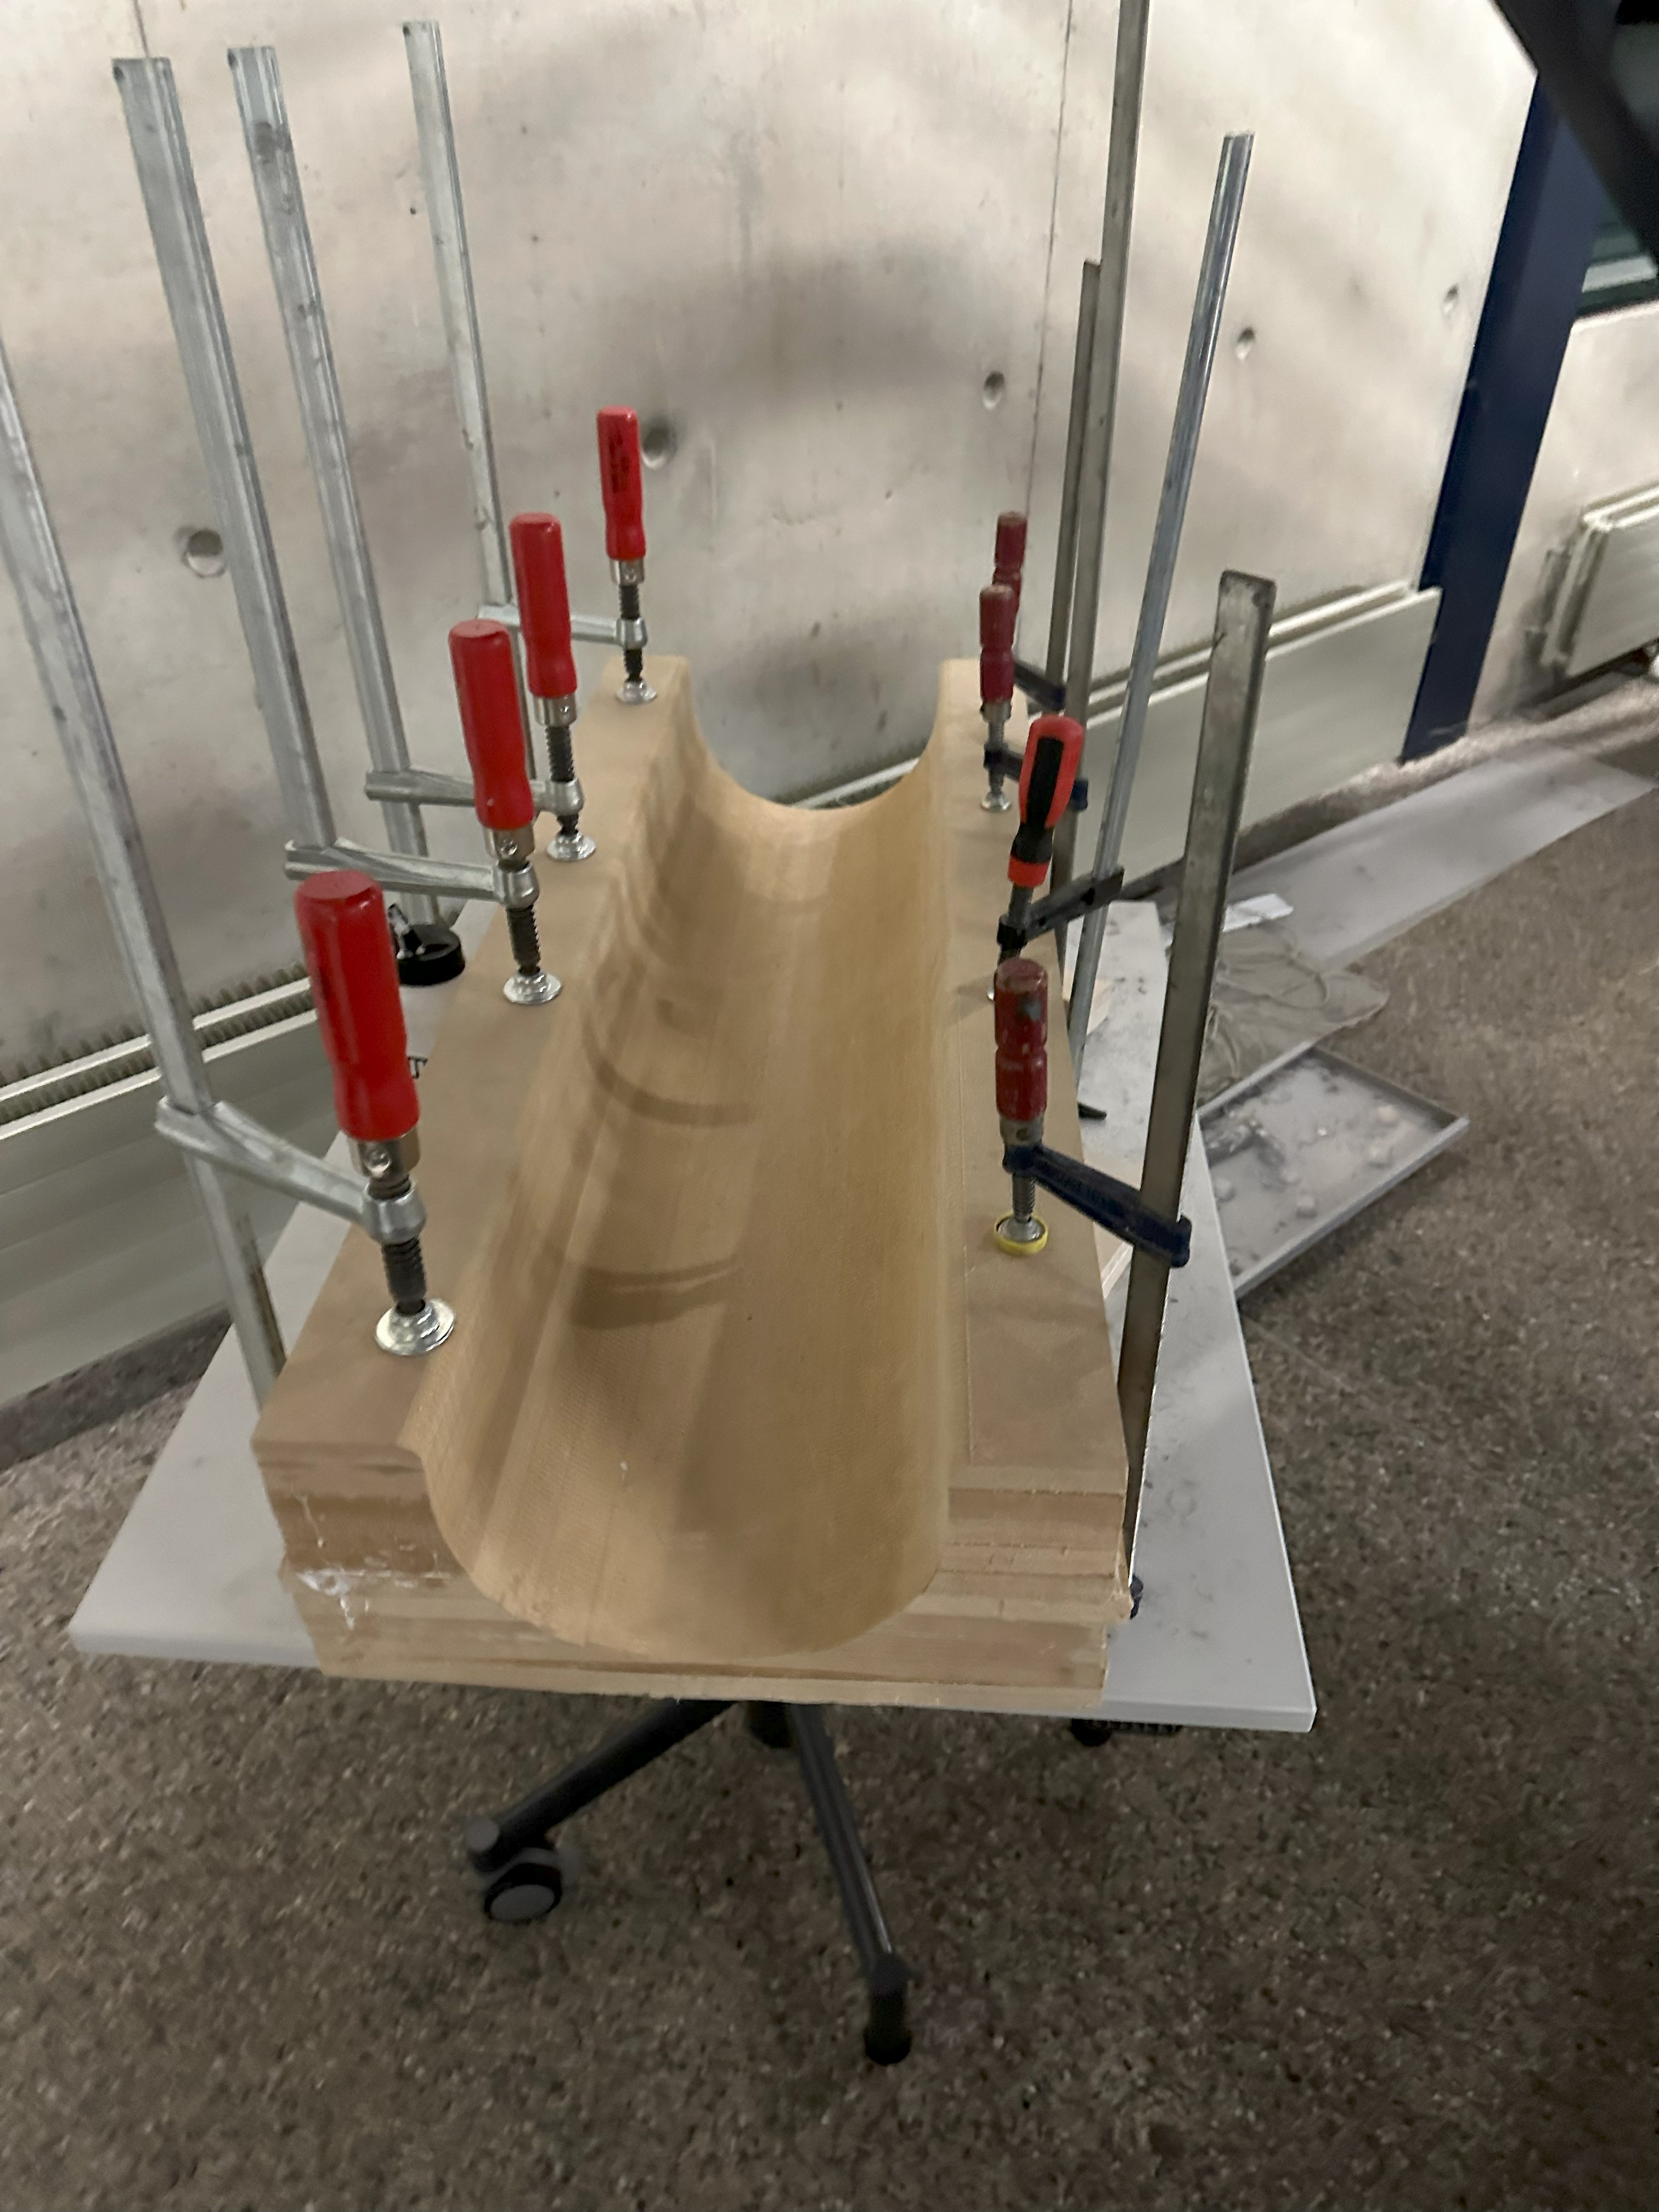
| Preparing the brut: stacking of MDF boards with wood glue using a serrated spatula. Let the glue dry for min 1h. Use two clamp. | Serrated Spatula/ MDF boards/ Wood Glue | |
| Prepare the fixing plate by doing holes with the drill. We need to fix the brut to the plate, and the plate to the CNC ground. Use screws M4 ( warning: not to long,not to damage the CNC). Fix the block on the CNC. | CNC, MDF, Screws, Drill | |
| Configurate the CNC (description above) | CNC, Computer of the CNC, Remote of the CNC | |
| Click on CYCLE AND START. Let the CNC do the job. | CNC | |
| Remove it from the CNC but keep it fixed on the support MDF. Sand the surface to make sure there is not waves anymore. | Sanding devices |
¶ General Comments
It is very important to have a very good quality of seal, if there is a leak, we will get a very poor result.
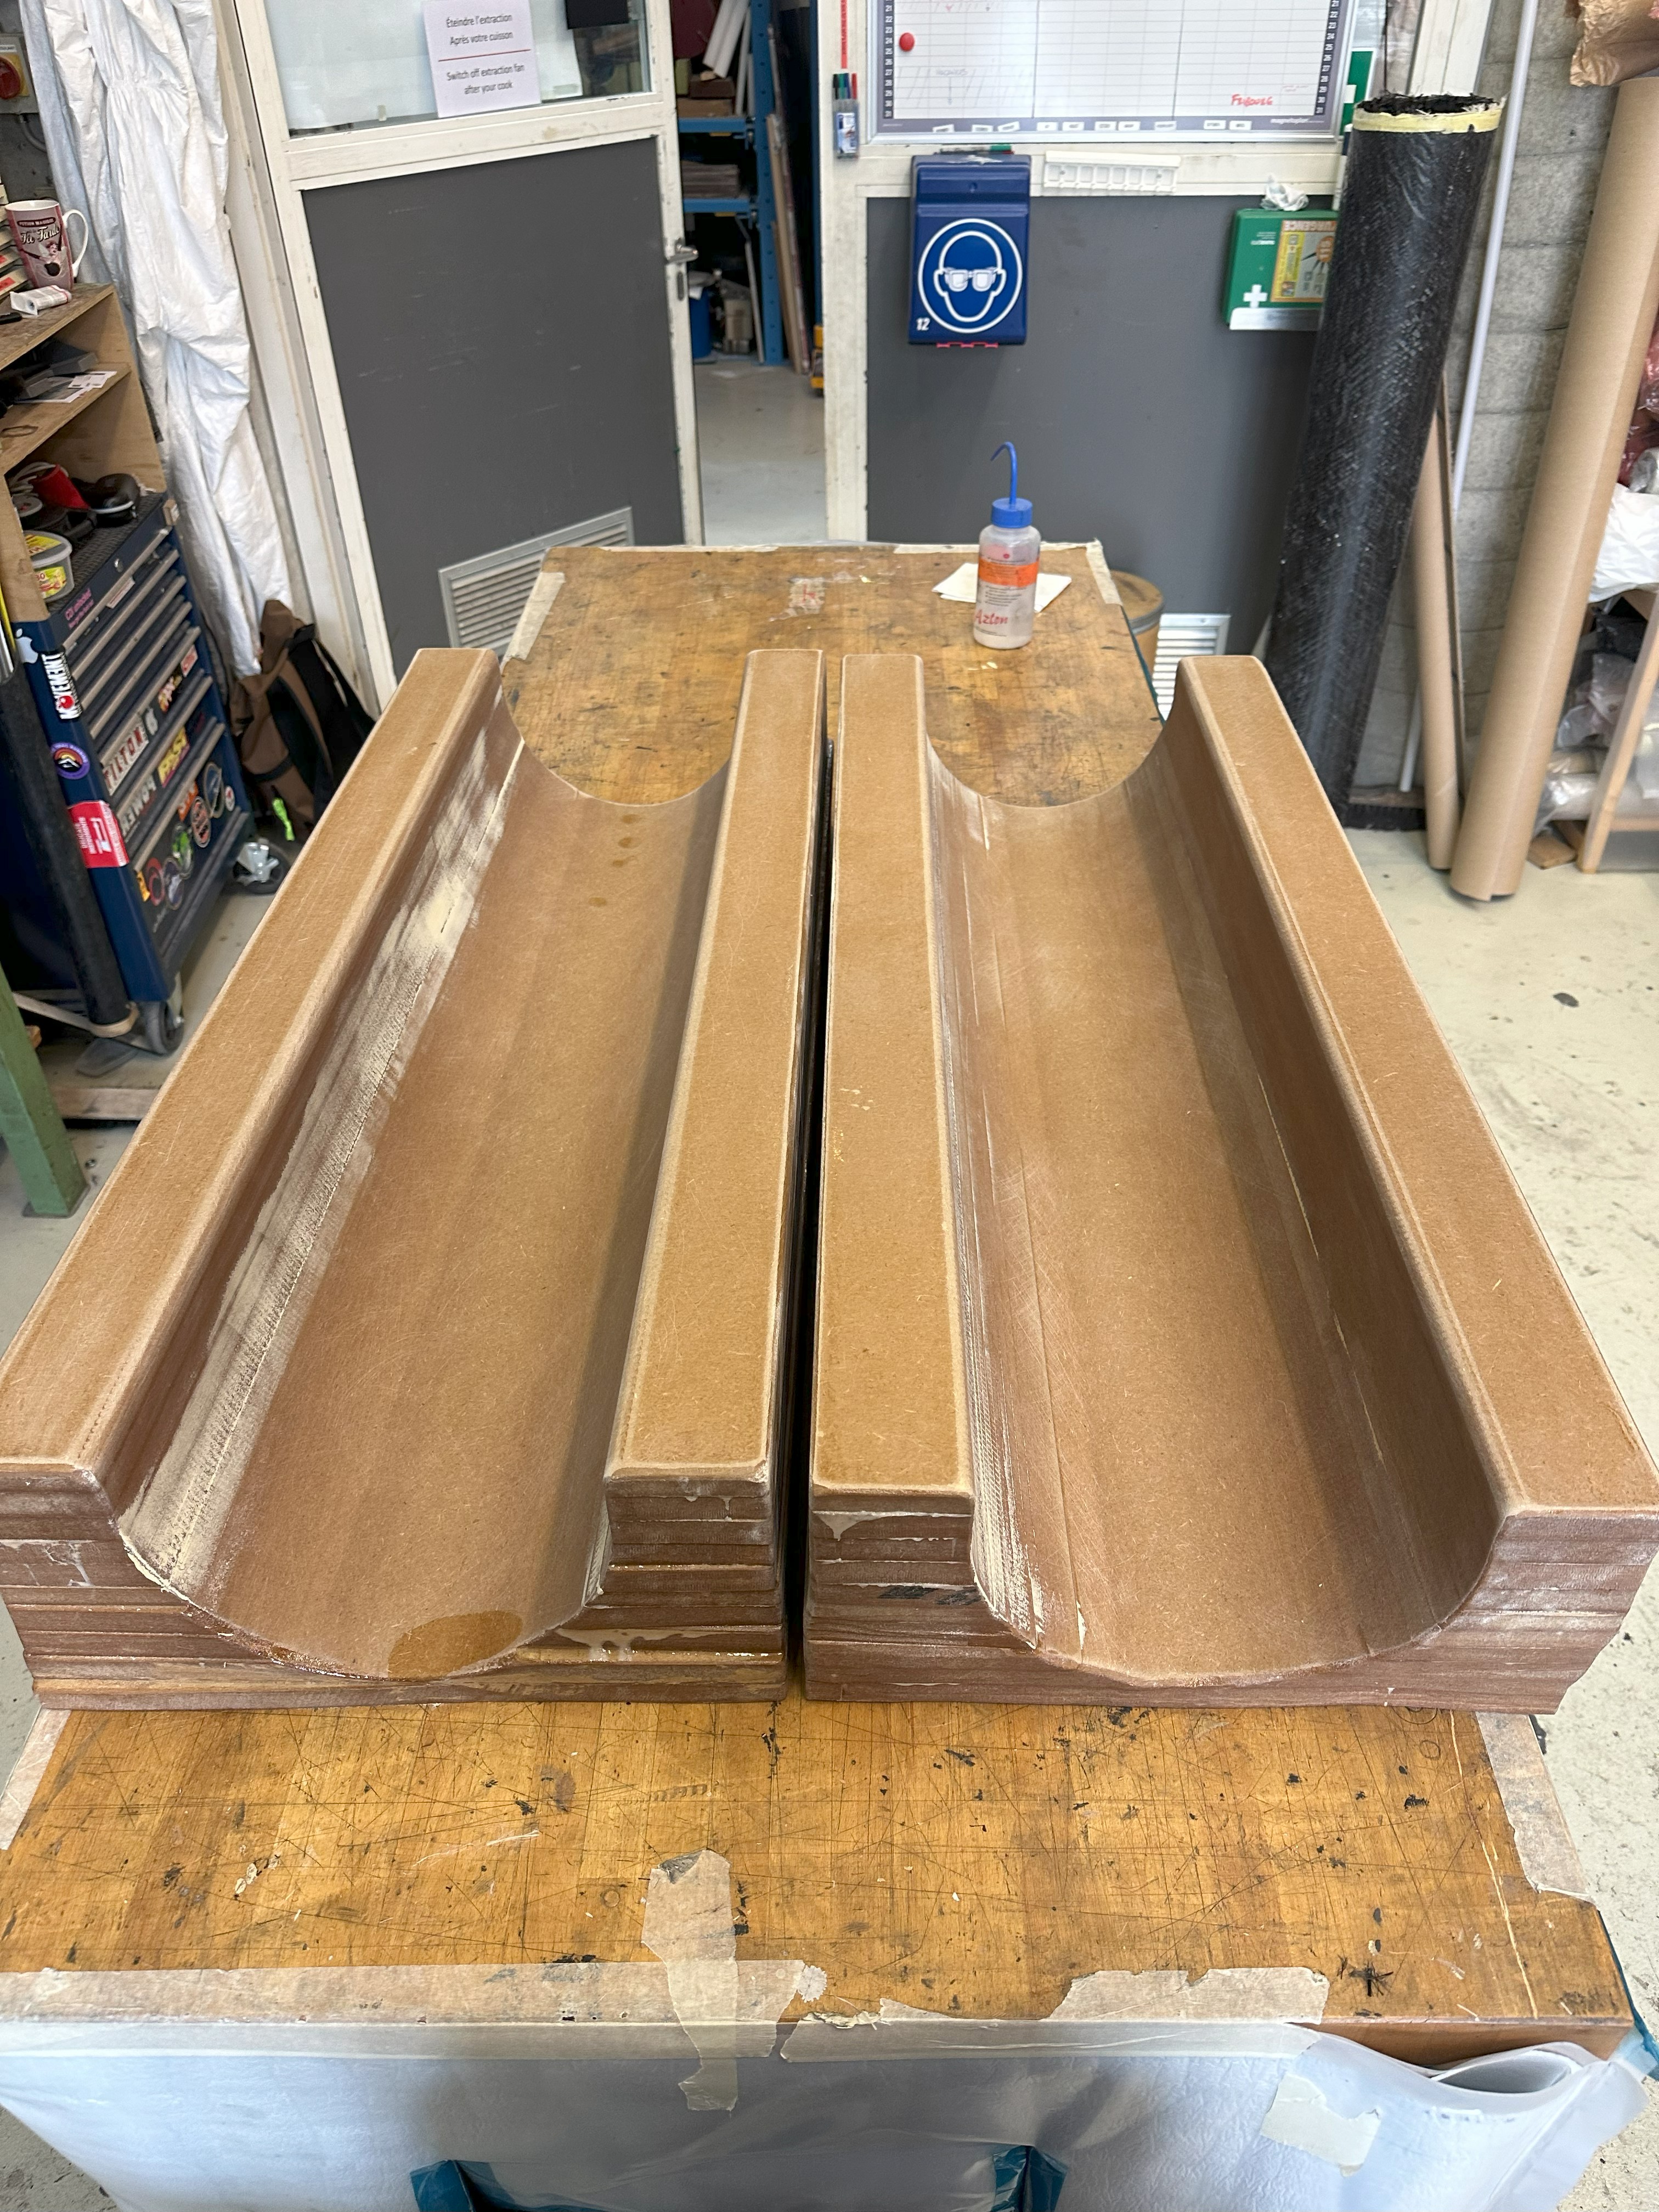
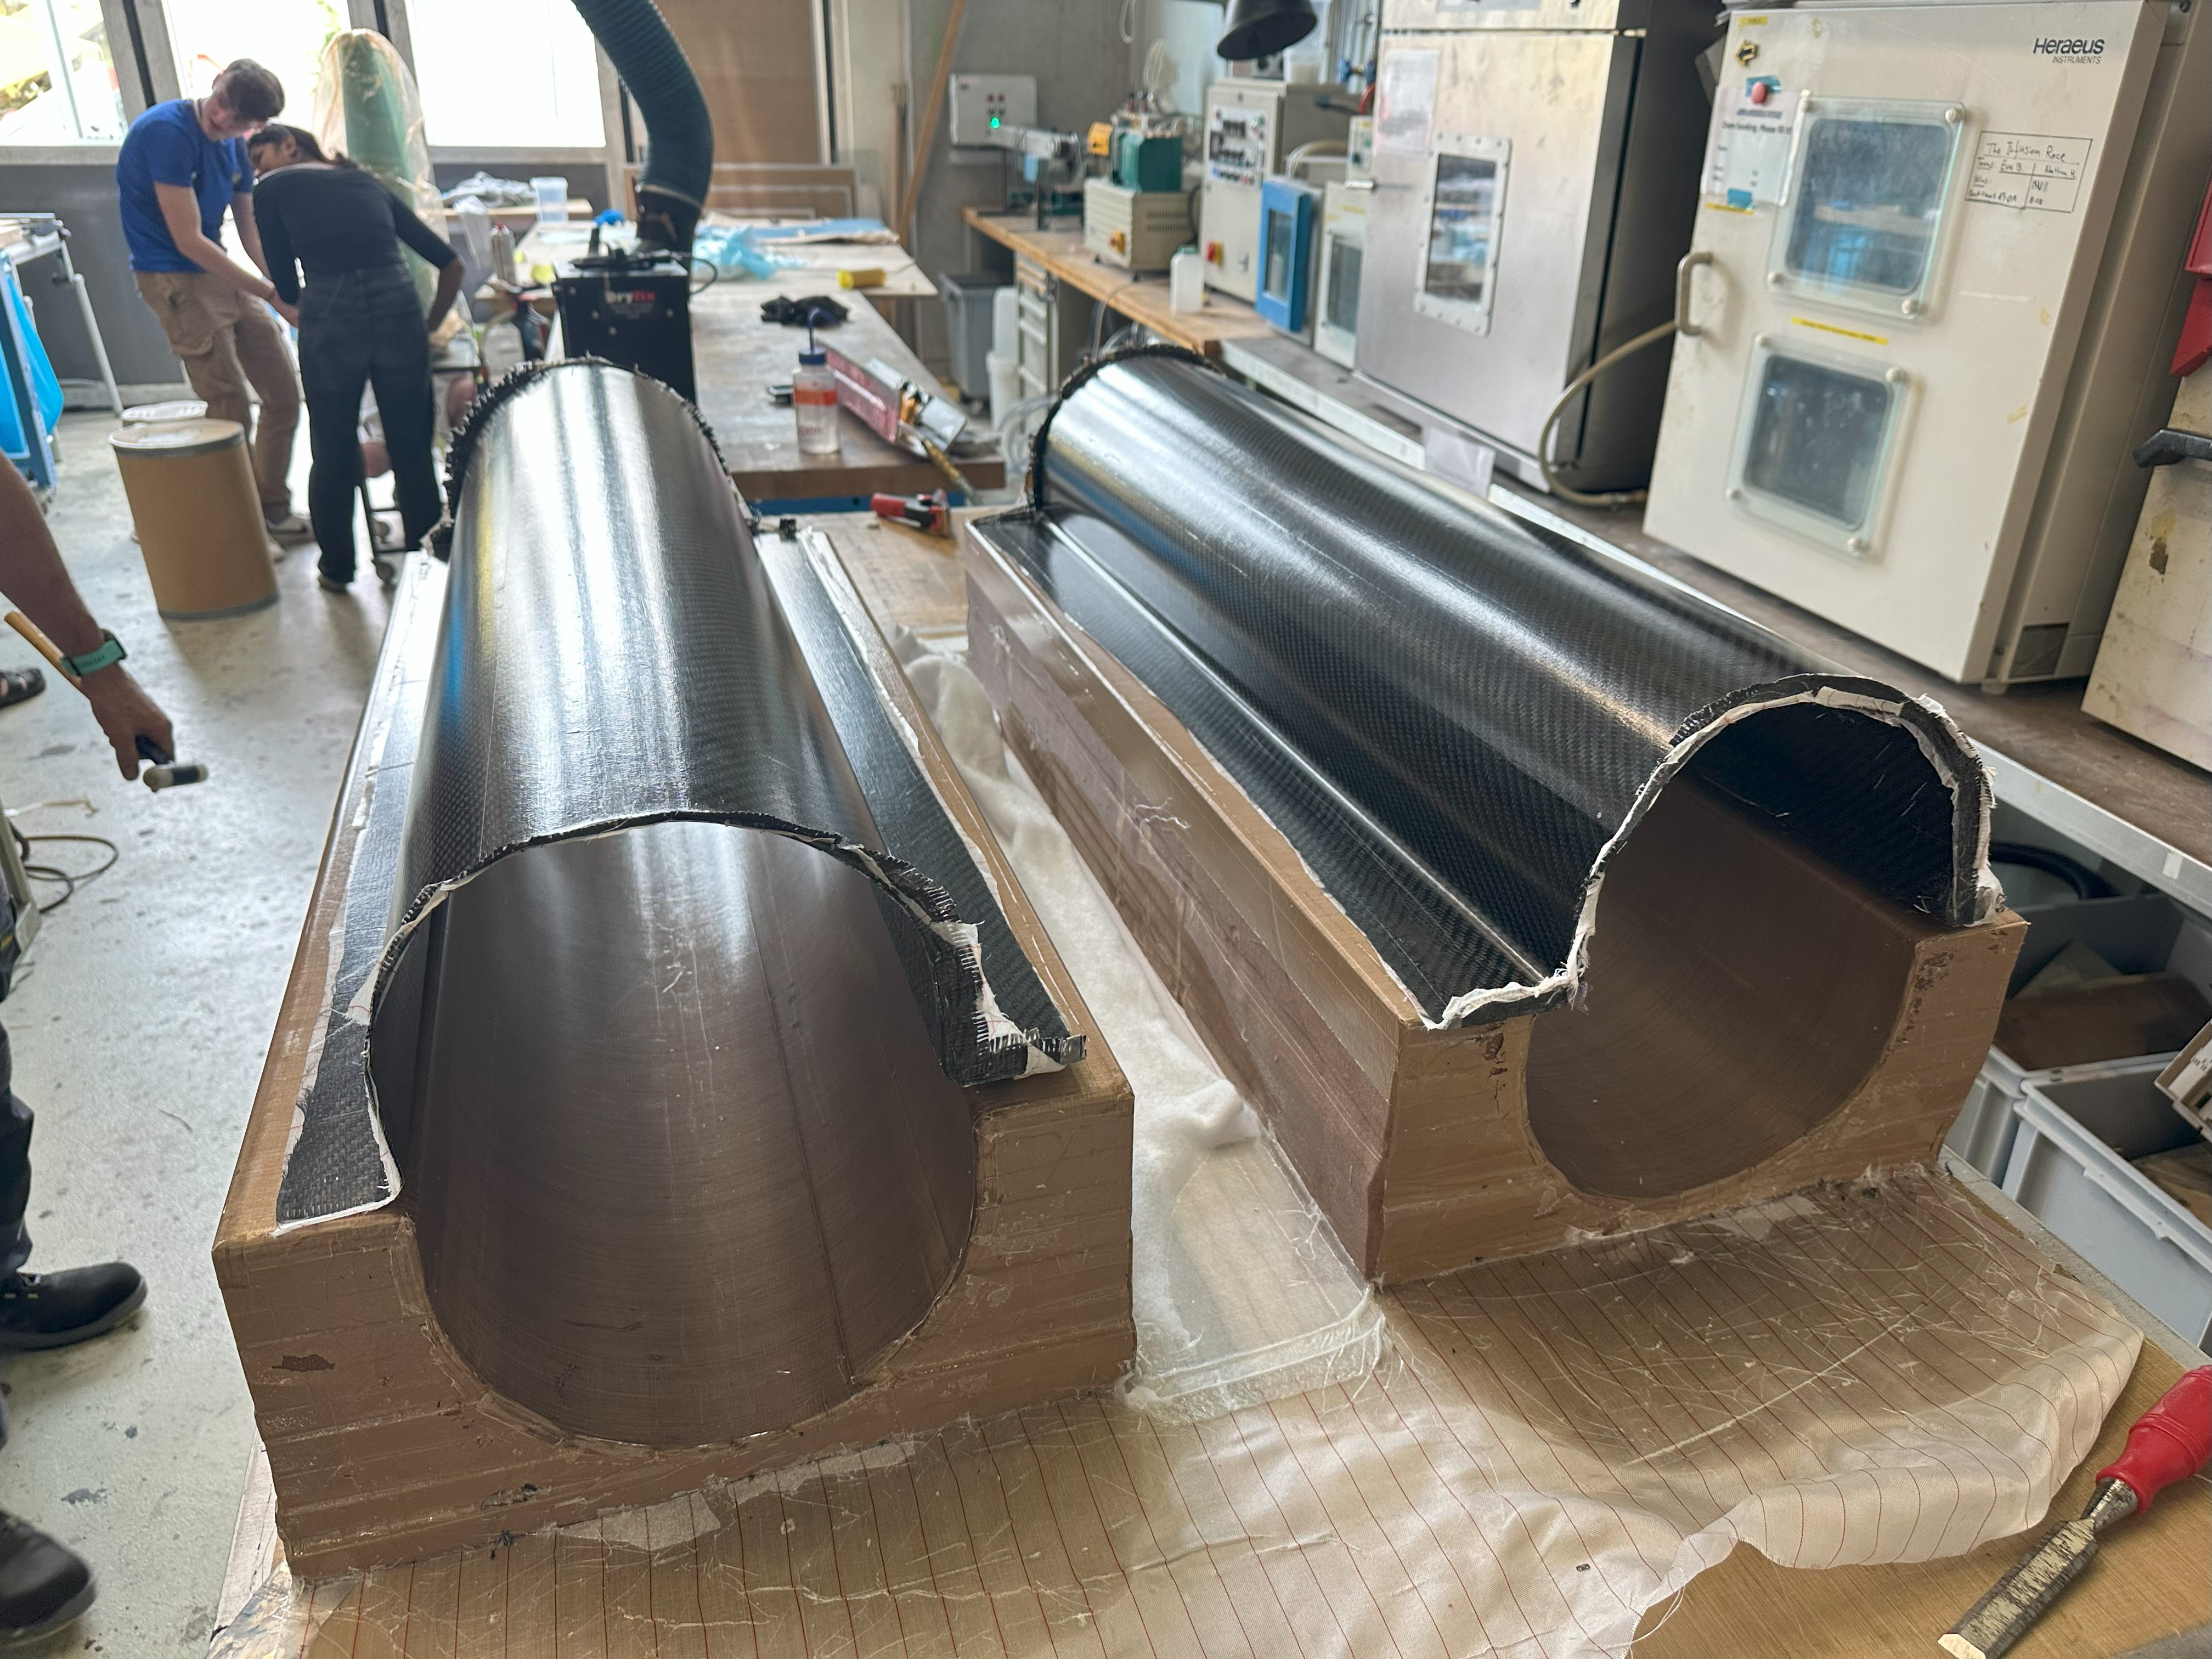
Also, some other mould designs may have to be assembled after the CNC process, as you can see here, also you can produce 2 moulds to accelerate production rate:
¶ Carbon Infusion Draping
¶ Parts List
| Description | Qty |
|---|---|
| Composite part | 1 |
| Composite part Mold | 1 |
¶ Pre-Operations Checklist
¶ Participants
| Check | Responsible for: | who? |
|---|---|---|
| Equipment Checklist | Team members | |
| Safety | Team members / Gavin | |
| Documenting/Reporting | Team members | |
| Preparing the operations on-site | Team members |
¶ Raw Material
| Check | Item | Qty |
|---|---|---|
| Release agent | ||
| Dry carbon fiber fabric | ||
| Spray adhesive (Fusion Fix EP) | ||
| Epoxy resin (low viscosity) | ||
| Peel ply (Q511710) | ||
| Infusion mesh | ||
| Teflon sheet | ||
| Vacuum infusion mesh | ||
| Vacuum bagging film | ||
| Teflon tape | ||
| Infusion tubes | ||
| Vacuum sealing tape |
¶ Tools
| Check | Item |
|---|---|
| Fabric scissors | |
| Consolidation roller | |
| Vacuum pump | |
| Vacuum gauge | |
| Release agent applicator | |
| Resin infusion connectors | |
| Resin infusion tubing | |
| Resin mixing cups | |
| Disposable gloves | |
| Cutting templates | |
| Teflon sheet | |
| Vacuum sealing tape | |
| Breather/bleeder cloth | |
| Infusion mesh | |
| Vacuum bagging film | |
| Resin trap |
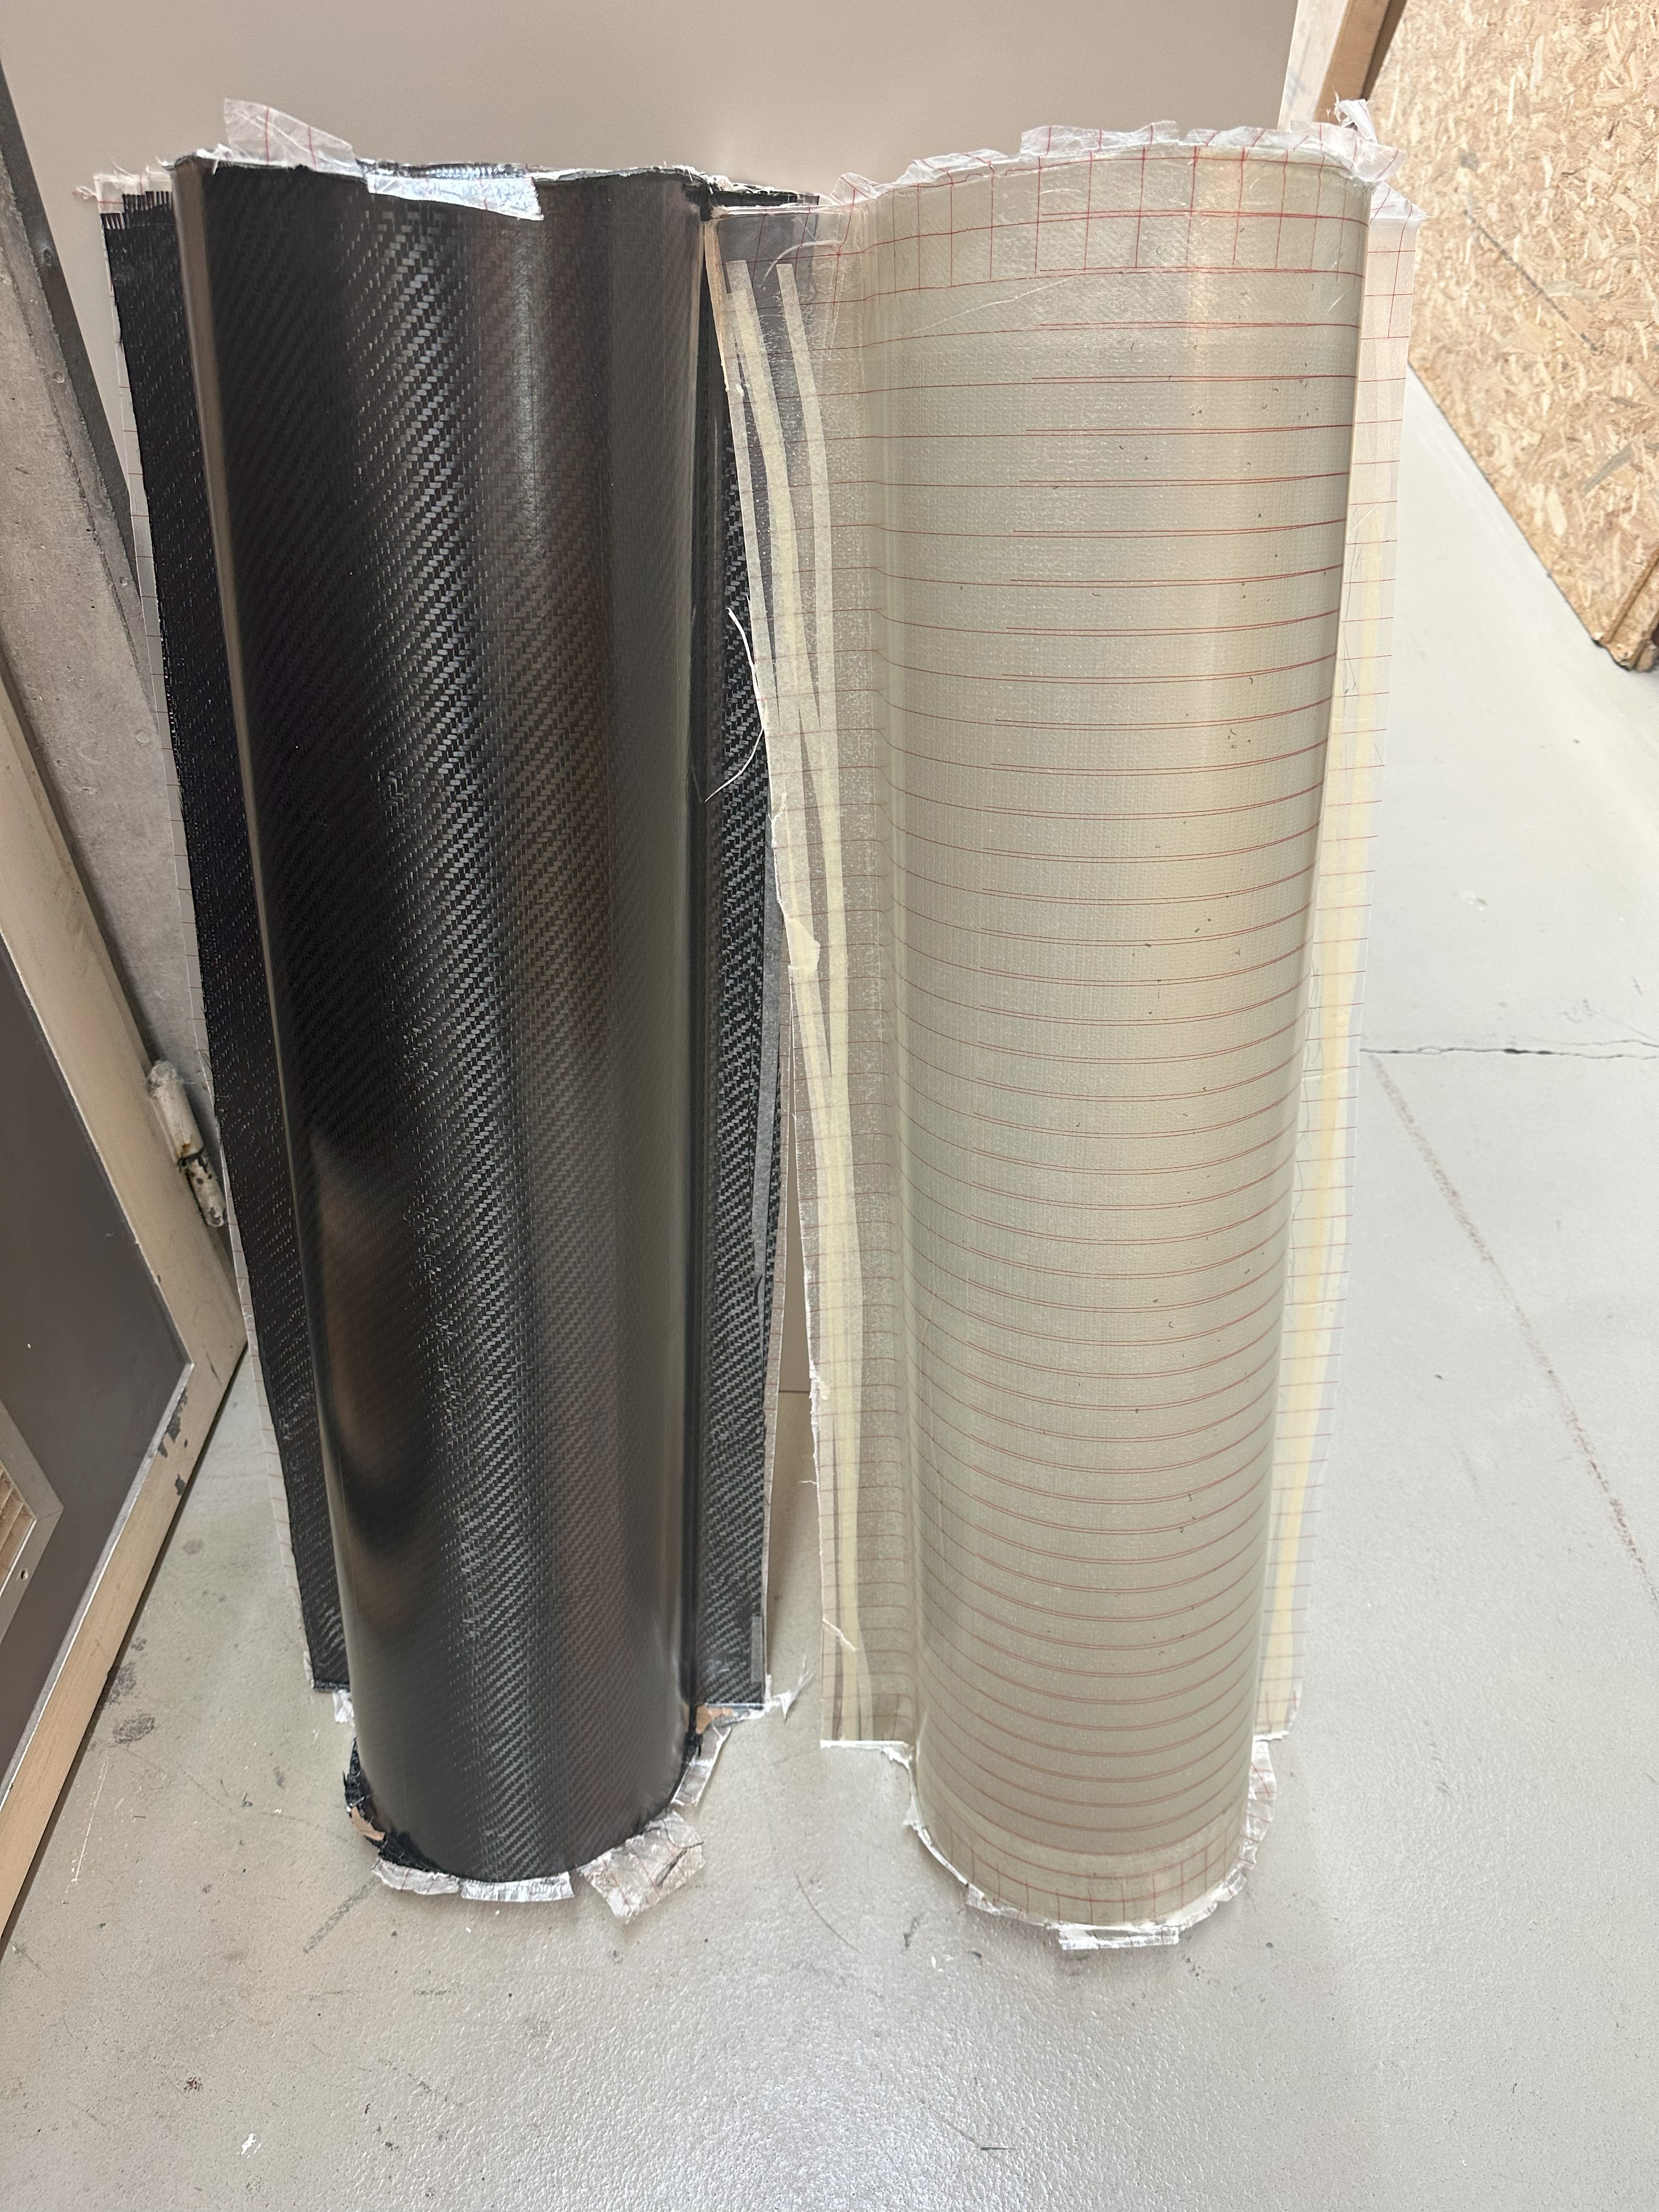
Before starting the procedure, make sure that the teflon tape is applied correctly:
¶ Procedure Body
¶ Location
| Check | Step description | Tools & Materials involved |
|---|---|---|
| Apply release agent on mold surface. | Release agent | |
| Cut carbon fiber fabric according to template, adding extra margin. | Fabric scissors, Carbon fiber fabric, Cutting templates | |
| Apply spray adhesive lightly to the mold surface. Wait 30 seconds. | Spray adhesive | |
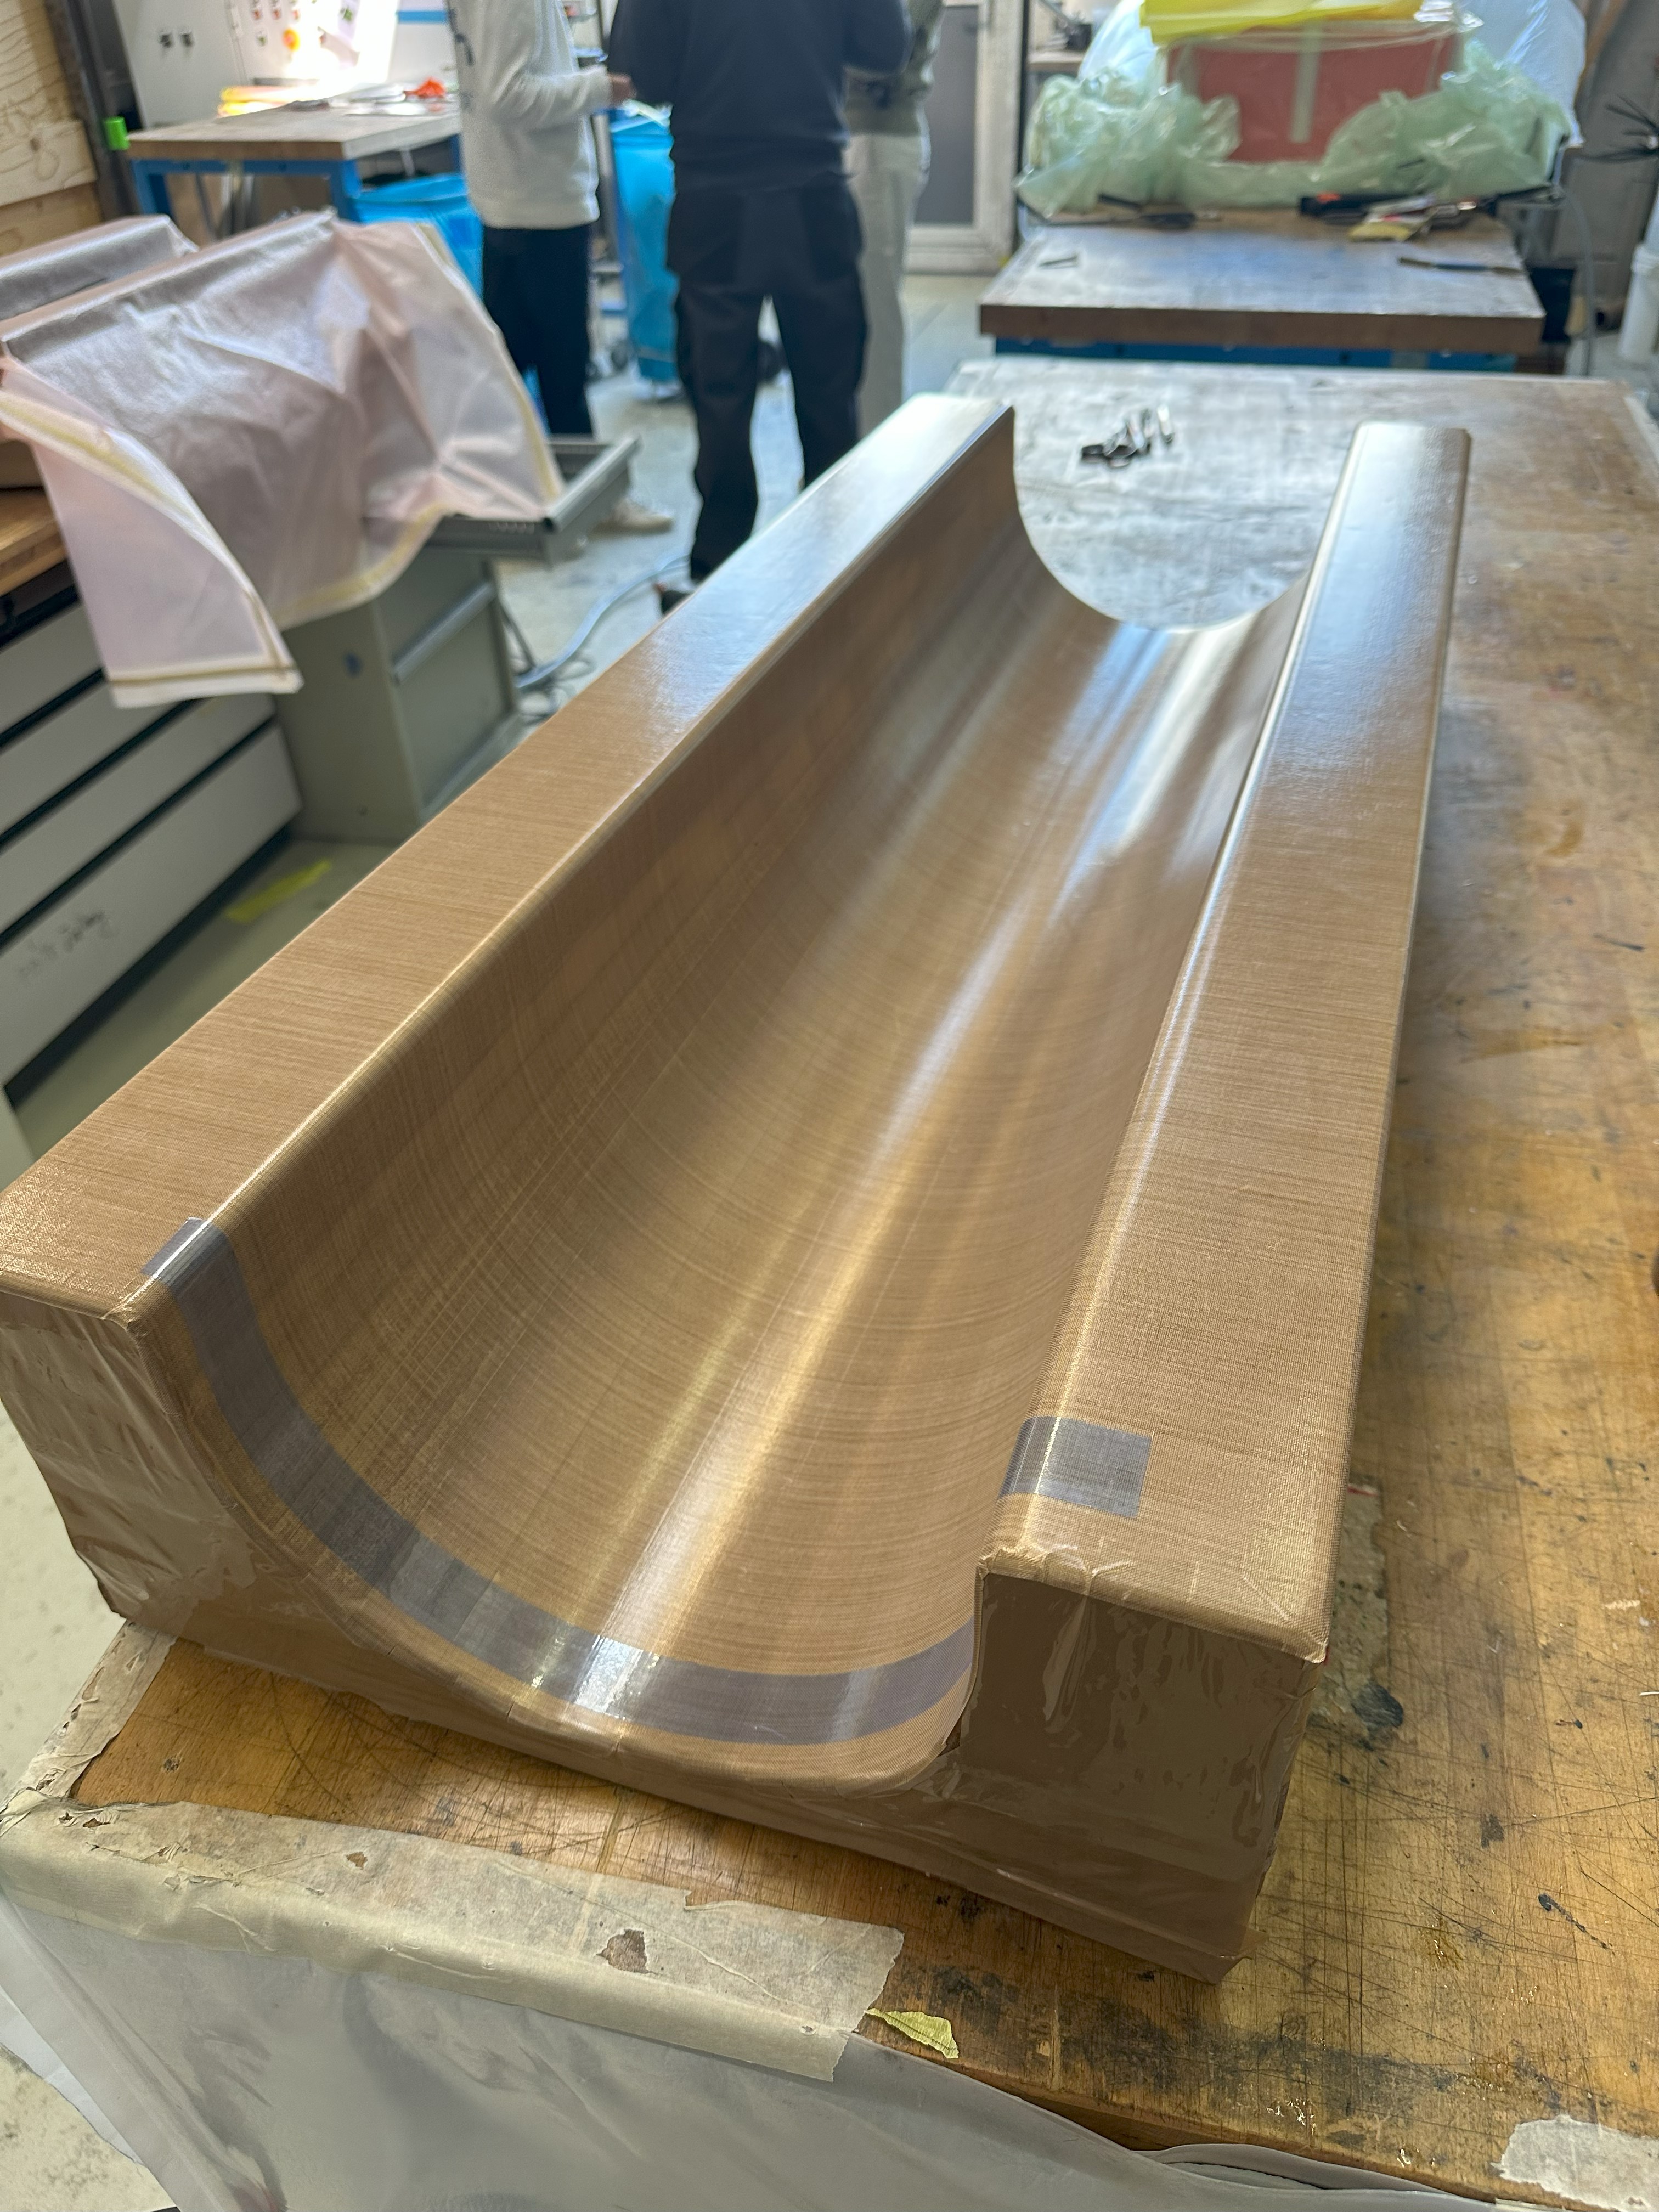
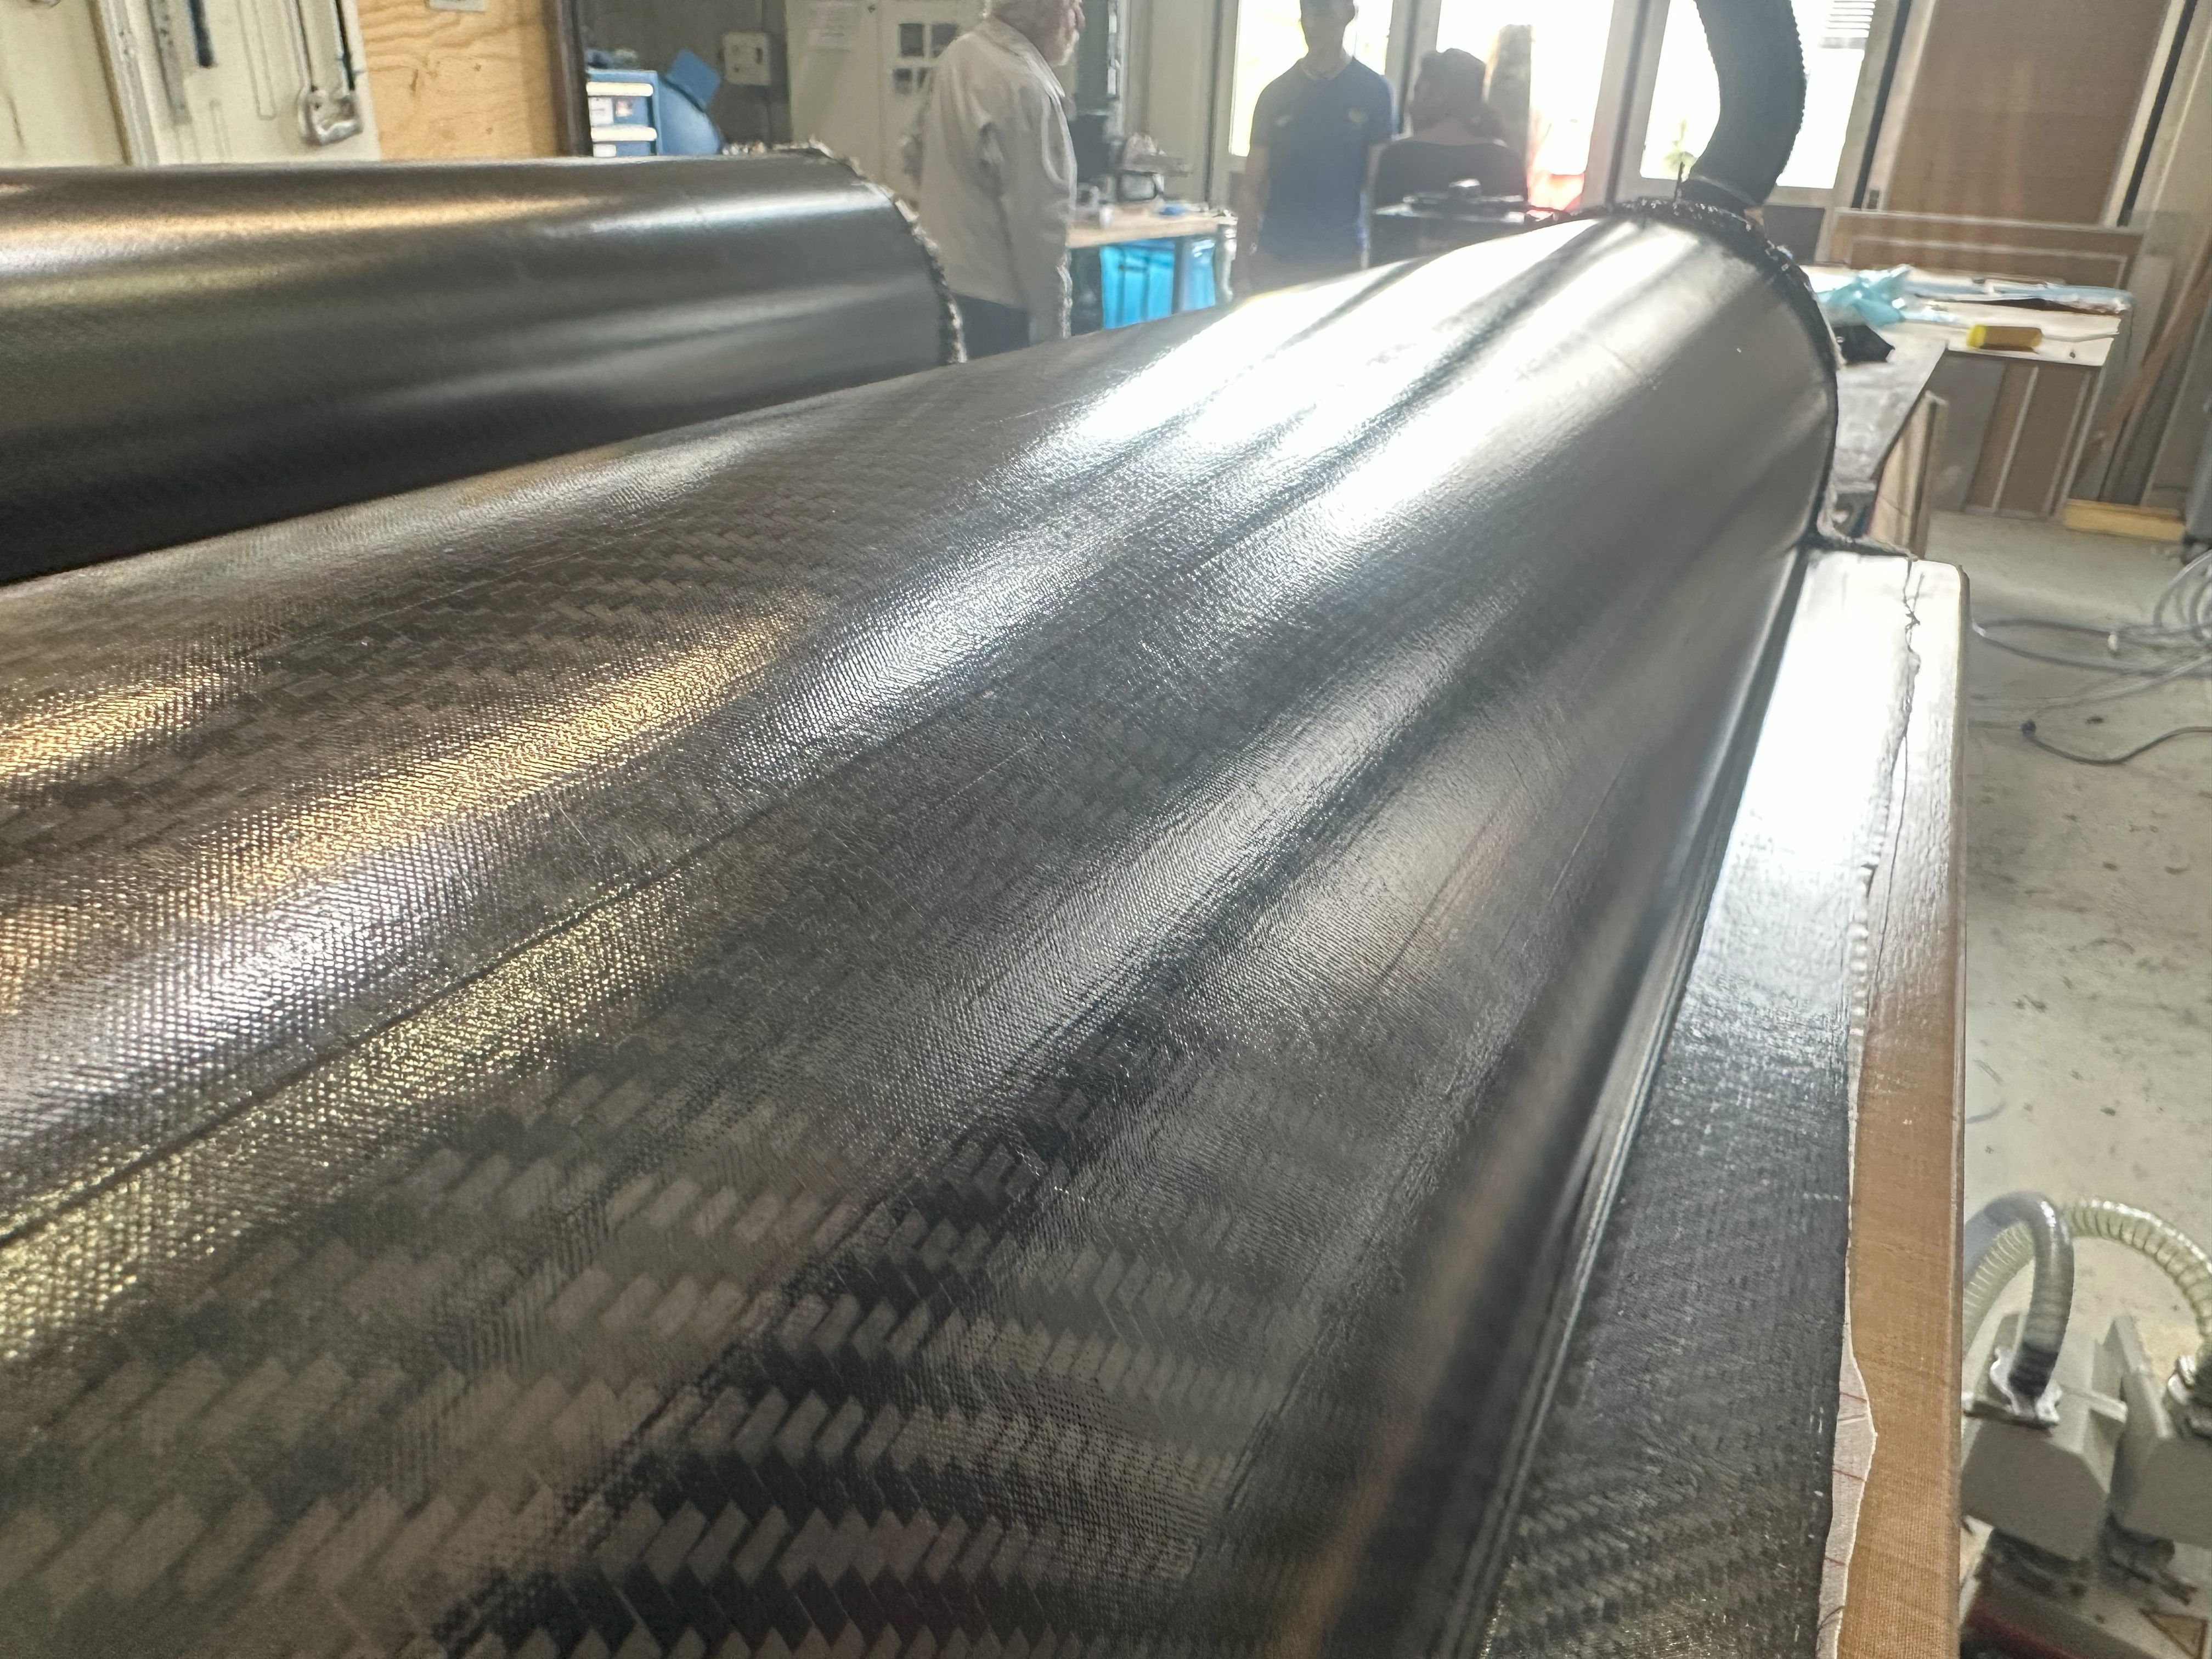
| Position and lay the first carbon fiber layer onto mold surface. | Carbon fiber fabric | |
| Lay subsequent carbon fiber layers. | Carbon fiber fabric | |
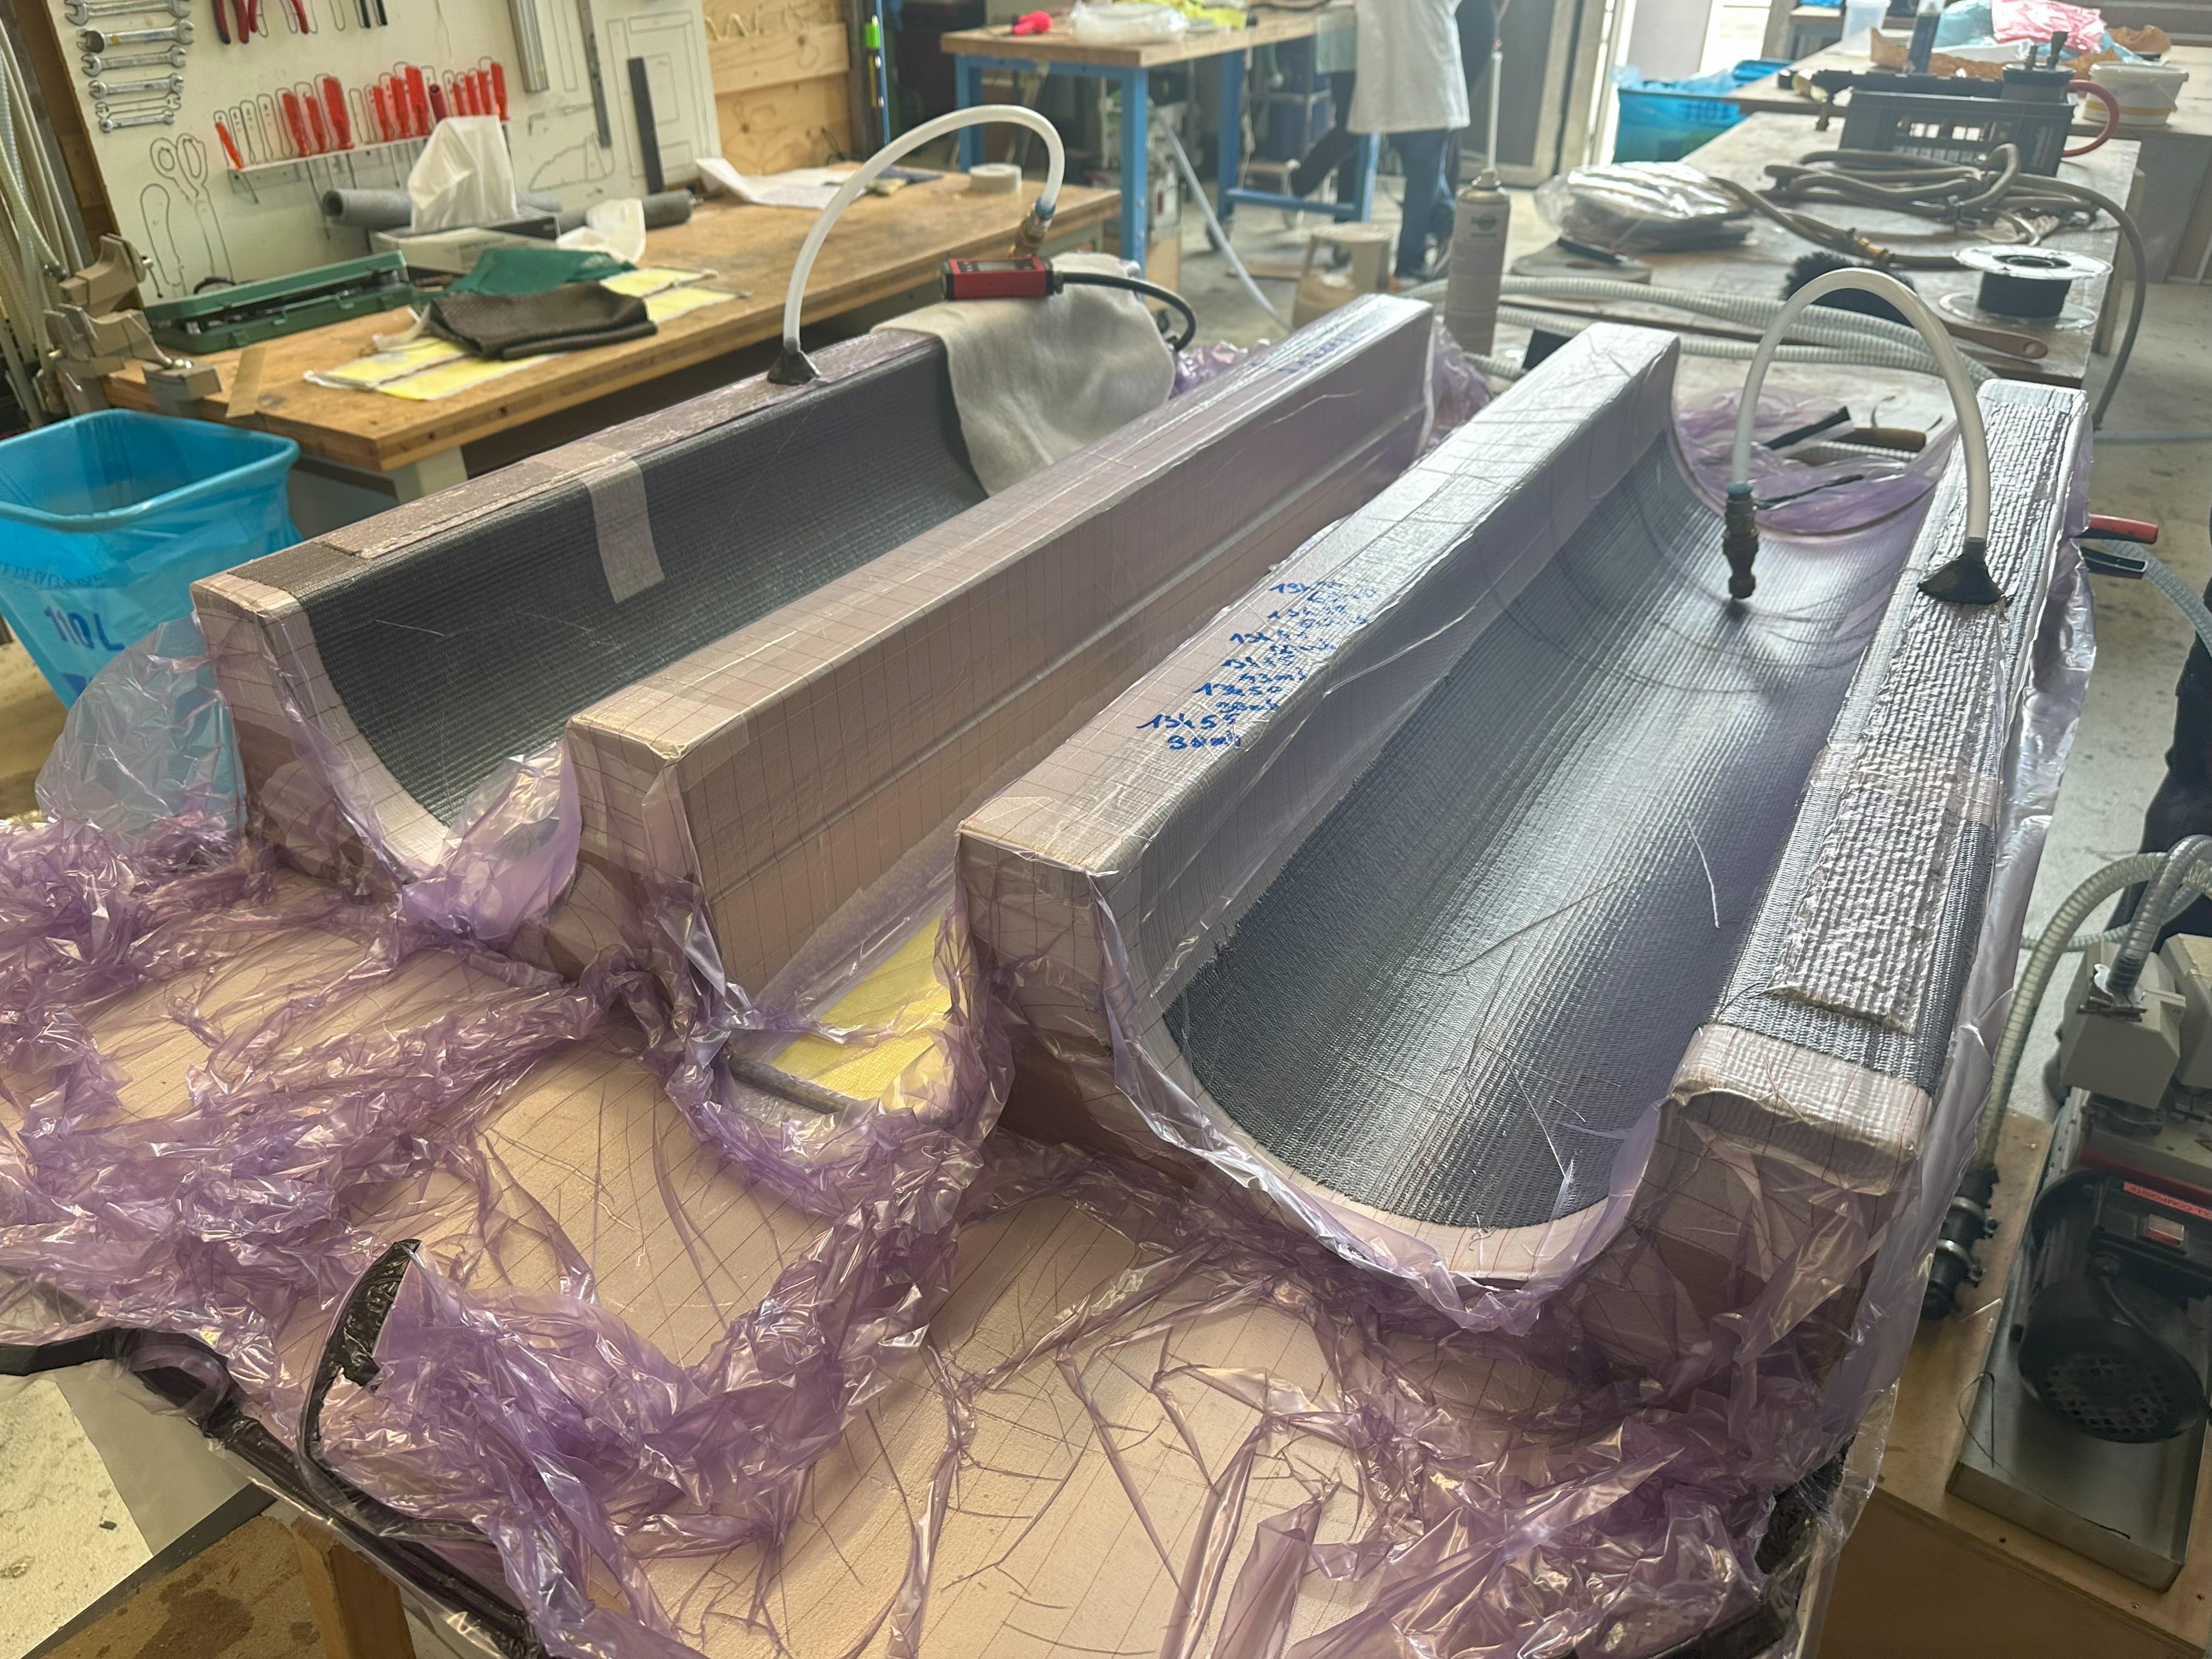
| Apply peel ply on top of fiber layers. | Peel ply | |
| Place infusion mesh on top of peel ply. | Infusion mesh | |
| Position resin distribution tubing and infusion connectors. If possible put them on the opposite side of the pièce | Infusion tubing, Infusion connectors | |
| Prepare and attach vacuum bag, sealing all edges with vacuum sealing tape. | Vacuum bagging film, Vacuum sealing tape | |
| Connect vacuum pump to vacuum bag and resin trap. Perform vacuum leak test. For this, block the inlet of resine and the outlet of the pump and wait 10 min to see if the pressure increase significantly. It is very important to have a near perfect void. | Vacuum pump, Vacuum gauge, Resin trap | |
| Wait 10 min and see if pressure increase. If it does, it means there is a leak, try to find it | Time | |
| Mix epoxy resin according to manufacturer's ratio. | Epoxy resin, Disposable gloves, Resin mixing cups | |
| Infuse resin under vacuum until complete saturation of fibers is achieved. | Vacuum pump, Vacuum gauge, Resin infusion connectors, Resin trap | |
| Monitor curing process as per resin specifications. | Stopwatch, Temperature gauge | |
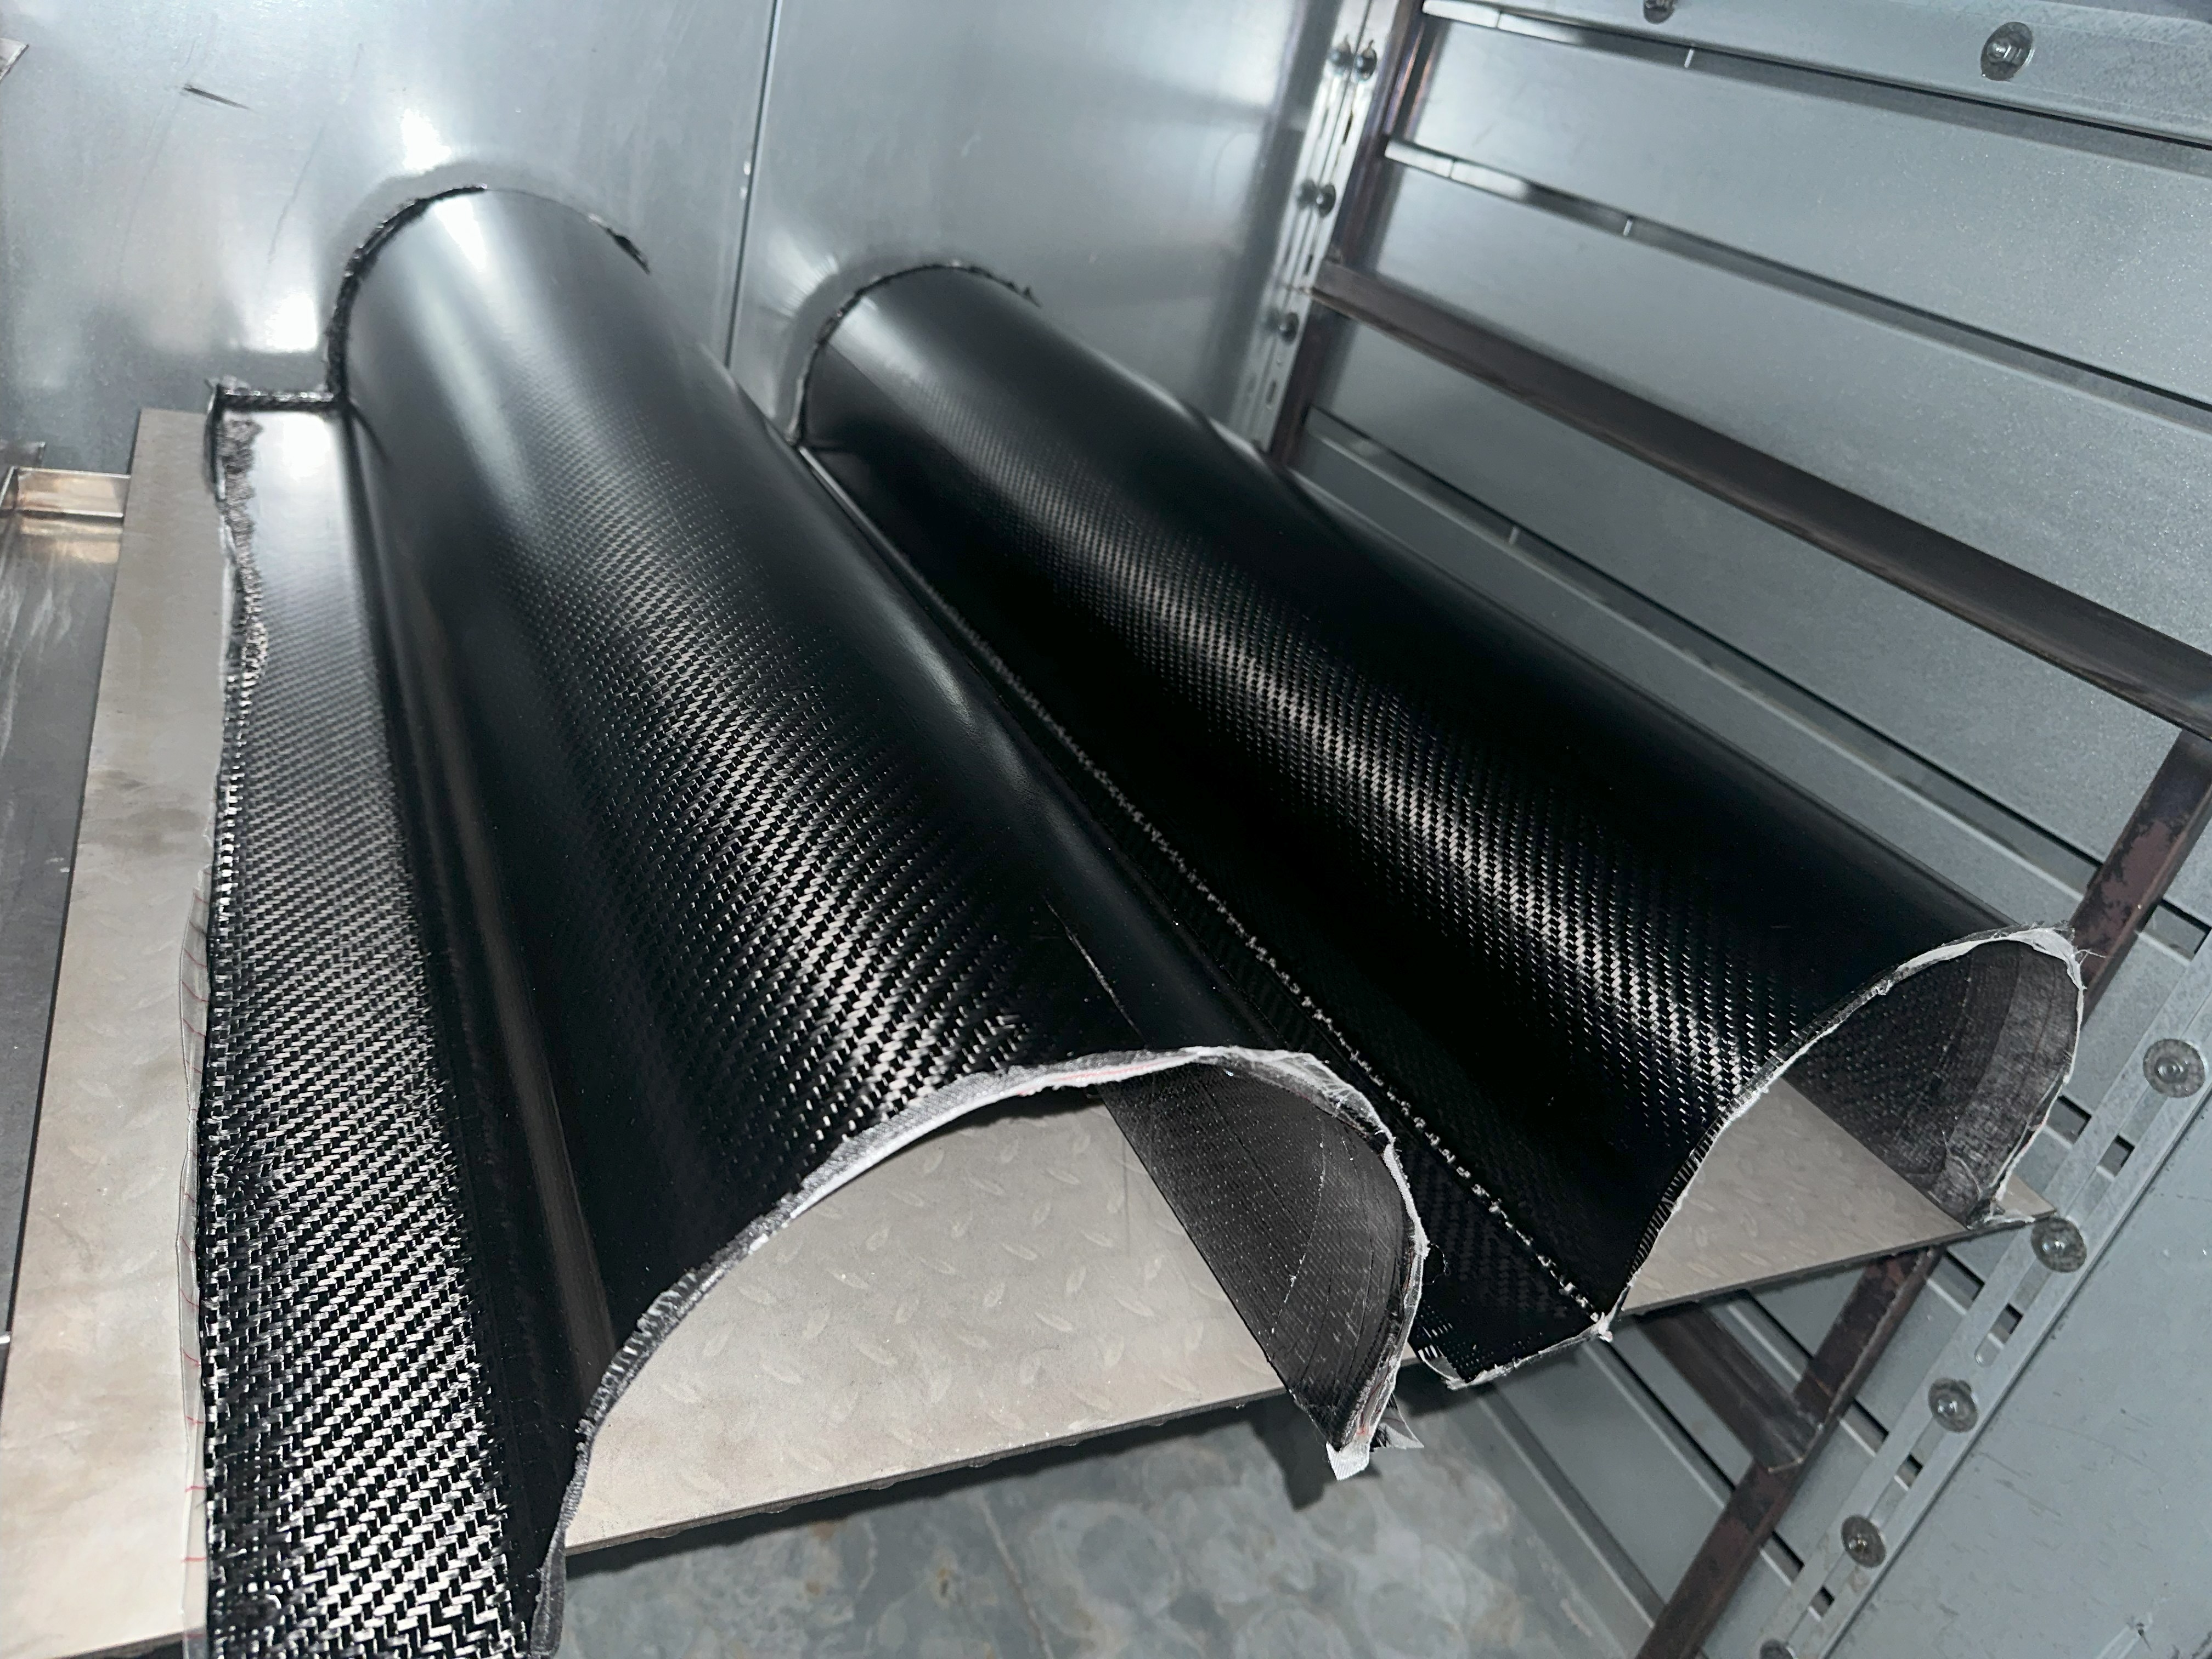
| Demold the cured aerocover carefully. | Consolidation roller, Gloves | |
| Inspect final component for defects and imperfections. | Visual inspection tools | |
| Do not take the peel ply for better storage. | Visual inspection tools |

¶ Post Conditions
| Check | Step | Description |
|---|---|---|
| 1 | Verify complete resin infusion, no dry spots. | |
| 2 | Confirm proper curing (hardness, rigidity). | |
| 3 | Ensure surface quality, no visible defects. | |
| 4 | Verify dimensions match specifications. | |
| 5 | Ensure clean demolding without damage. |
¶ General Comments
It is very important to have a very good quality of seal, if there is a leak, we will get a very poor result.