¶ Introduction
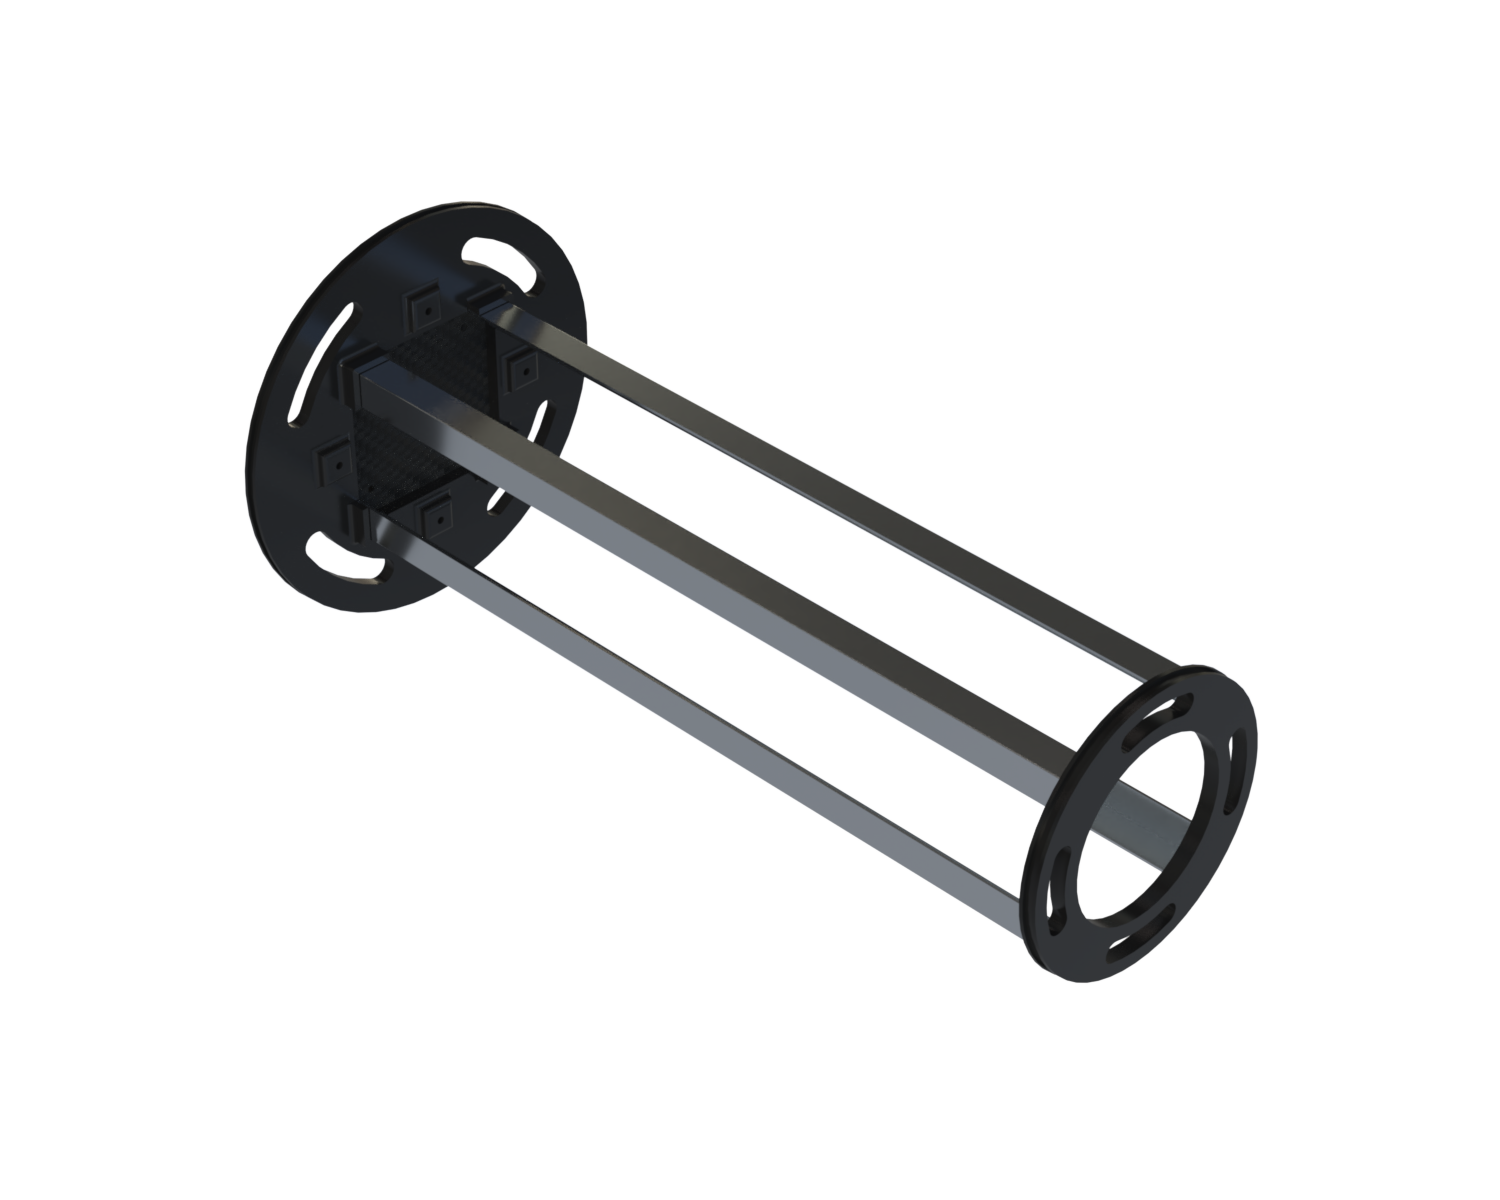
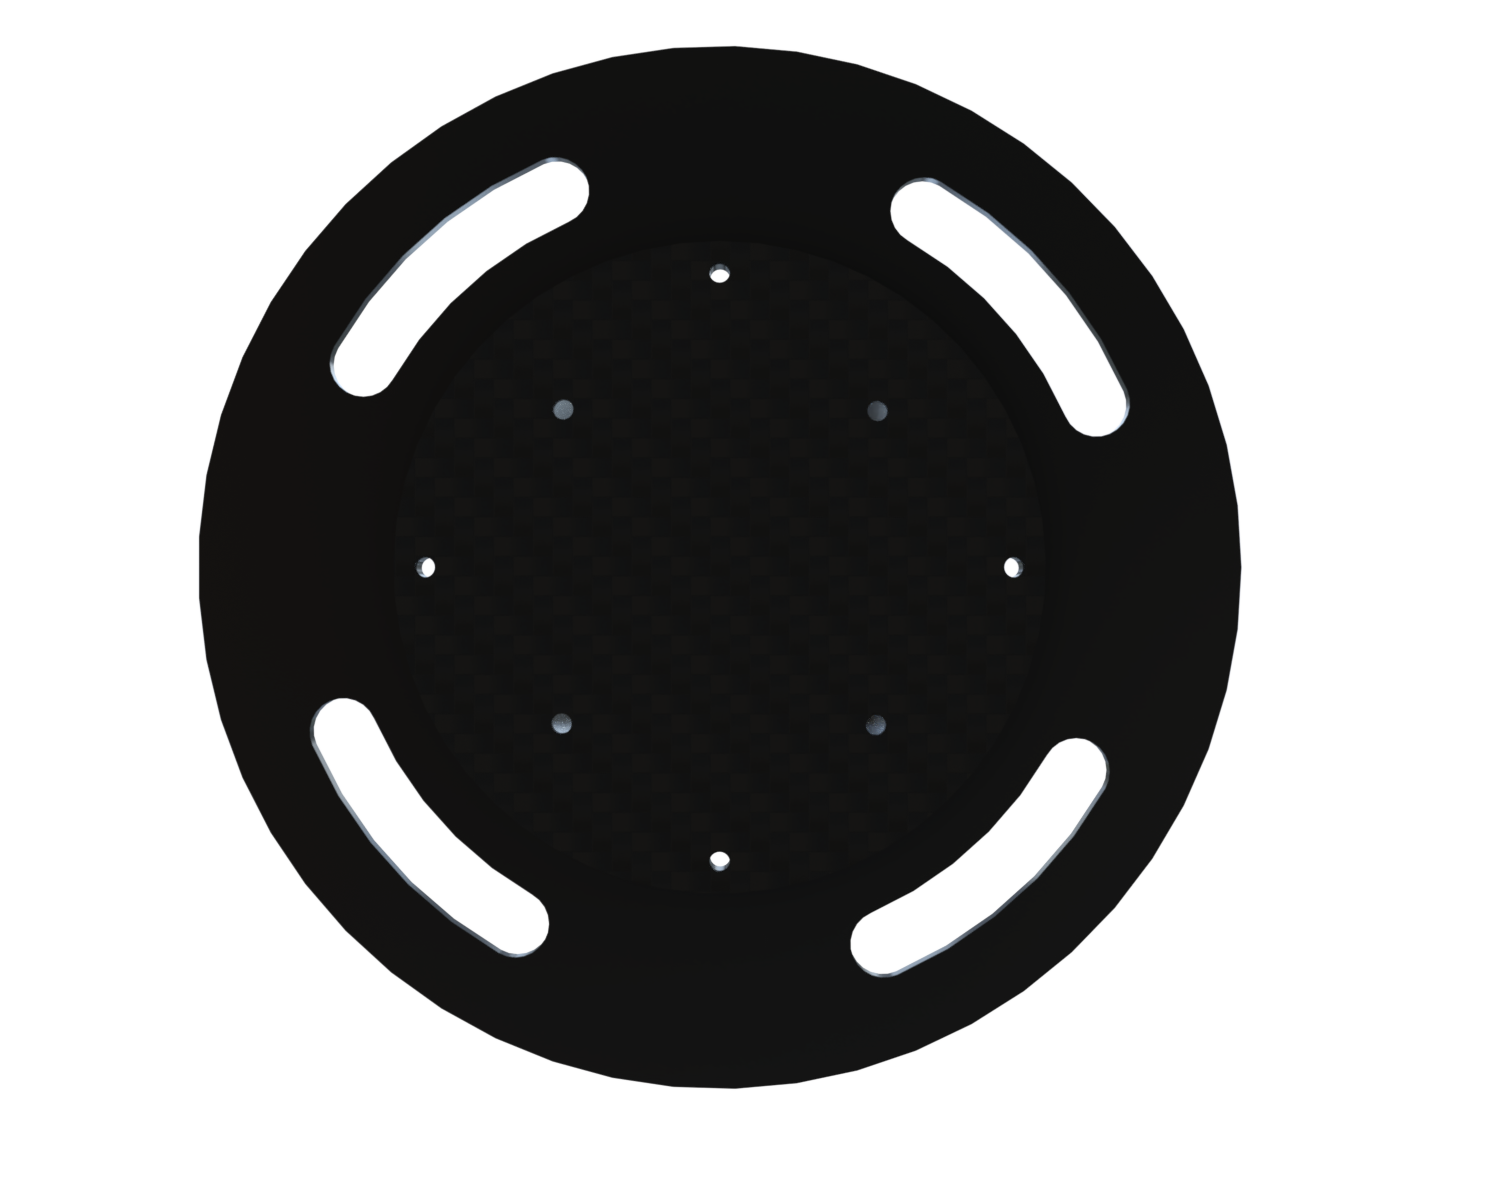
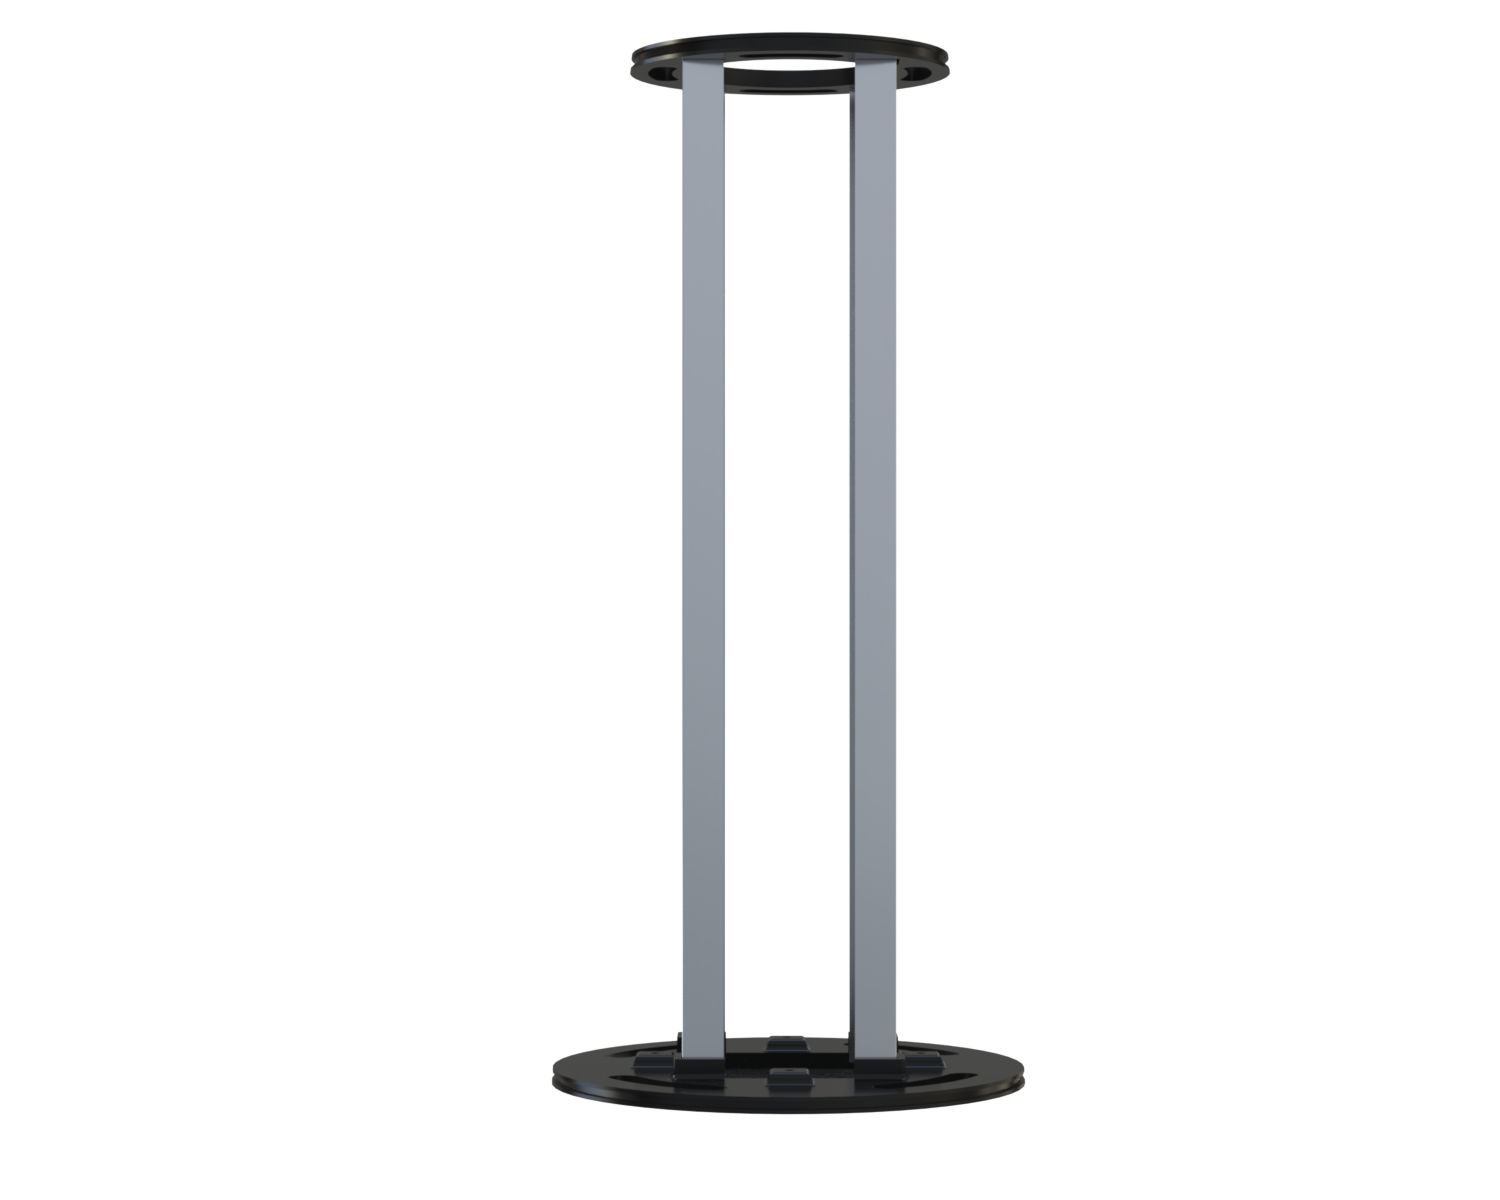
¶ What the assembly looks like
¶ Isometric view
¶ Bottom view
¶ Front view
¶ Purpose, Objective and Scope
This document was prepared to help assemble the Payload-Bay in order for it to work properly.
It will cover all the steps of the manufacturing process of the PL-bay. The Payload-Bay is located within the nosecone of the rocket and holds in place the Payload-Bay
To host the Payload in the nosecone, the Payload is secured in place by the Payload-bay.
¶ Definitions and Abbreviations
PL : Payload
PL-bay : Payload-bay
Inferior plate : refers to the plate with the bigger diameter and the extrusions around the corners of the square hole
Superior plate : refers to the plate with the smaller diameter
¶ Applicable and reference documents
¶ Parts list
|Description | Part Ref | Qty |
|----------|
|Superior Plate | 211201 | 1|
|Inferior Plate |211202 |1|
|Rod | 211203 | 4 |
¶ Pre-Operations Checklist
¶ Participants
| Check | Responsible for : | Name |
|--------|
|| Equipment Checklist | Paul |
|| Documenting | Paul |
|| Manufacturing | Paul |
¶ Raw materials
| Check | Item | Qty |
|--------|
|| PETG | 71g (superior plate) + 182g (inferior plate) |
|| Aluminium rods 2.5m | 1 |
|| Glue DP490 | A few centilitres |
||M4x20 3D inserts | 4 |
||3mm MDF| 1200mm by 200mm|
¶ Tools
¶ Storage Location
| Check | Item | Tool ref | Qty | Image |
|--------|
|| Milling macine | | 1 | ||
|| Heat set heater tool| | 1 | |
|| Metal saw | | 1 | |
|| Clamps| | 2| |
|| Laser cutting machine| |1| |
¶ Procedure body
Manufacture a fake payload using 3mm MDF and the laser cutting machine
Link to dxf file: https://shorturl.at/8Ee3W
¶ Location
| Check | Step | Description| Tool ref | Part ref | Image |
|--------|
|| 1 | Saw the rod in 4 smaller rods of 510mm each → Make sure there's margin on the rods so the rods can be cut to the exact length afterwards | Metal saw | 211203 | |
|| 2| Clamp the rods together so the length of the rods will be the same at the end |Clamps |211203 | |
|| 3 | Remove the excess until right length → Put the rods on the ground and make sure they're the same length + measure length of a rod (should be 500mm) | Milling machine | 211203| |
|| 4 | Prepare the glue (a few centilitres will suffice)| | |
|| 5 | Set the inferior plate with the vertical rod supports poiting up| | 211202 & 211203| | |
|| 6 | Cover the interface between the rod and the inferior plate with a thin layer of glue | | | |
|| 7 | Put the 4 rods in the corners| | | |
|| 8 | Set the fake PL between the 4 rods to ensure the right position of the rods| | |
|| 9 | Set the superior plate on the 4 rods | | 211201 & 211203 | |
|| 10 | Glue the other extremity of the rods on the plates| | 211201 & 211202 & 211201 |
|| 11 | Let dry for 24 hours (7 days until full strength) → Check the glue is dry| | | |
¶ Post conditions
| Check | Check number | Description | Image |
|------|
|| 1 |Insert and remove the fake payload to see if it slides in and out | |
|| 2 | Traction test to see if the glue holds (two people pull on each side)| |
|| 3 | Put inside the nosecone to see if there's play | |
|| 4 | Make sure there's no play between the payload and the fixation plate| |
¶ General comments
This document hasn't been reviewed yet and probably still needs some tweaking.
¶ Assembly of the PL-bay when hosting the PL
¶ Step 1
Place the PL in the PL-bay
¶ Step 2
Set the fixation plate underneath the inferior plate
¶ Step 3
Screw in place the PL using the 3d inserts in the inferior plate
¶ Step 4
You're good to go !
¶ Assembly of the PL-bay inside the nosecone
¶ Step 1
Attach a small magnet in the ridge of the upper ring of the PL-B. Make sure that the magnet stays inside the ridge so that it doesn't push against the nosecone when the PL-B is fitted inside the nosecone.
¶ Step 2
Repeat the operation for the lower ring, align the magnets so that later, the holes inside the nosecone will align and it will look pretty.
¶ Step 3
Fit the PL-B inside the nosecone and add magnets on the oustide of the nosecone. The spots where the magnets are pulled and the places where you want to drill holes. So mark them then rotate the PL-B by 60 degrees, making sure the PL-B stays as further in as possible. Repeat until full circle is complete. Then remove the PL-B.
¶ Step 4
Make the holes using 3mm drills (they are a little smaller than the width of the ridges: 4mm for the lower and 5mm for the upper).
¶ Step 5
Put the PL-B back in the nosecone and, using the glue gun, put glue inside the holes until there's only 2 holes left. To allow the air to come out of the ridge, you need to leave 1 hole when putting glue for the last time. At this point, continue applying DP490 glue until the glue comes out of the last hole.
¶ Step 6
Leave until dry
¶ Step 7
All good! Congrats!