¶ Introduction

The Payload Bay (PLB) is situated at the very top of Firehorn in the Nosecone Bay (NSB). It sole role is to properly integrate the Payload (PL) within the rocket.
¶ Definitions and Abbreviations
- PL: Payload
- PLB: Payload Bay
- NSB: Nosecone Bay
- AVB: Avionics Bay
- REB: Recovery Bay
- IP: Inferior plate
- SP: Superior plate
¶ Relevant Knowledge Needed
Previous Designs:
You might want to read the documentation of the previous PLBs:
Important difference with Nordend:
The main difference for the PLB between Firehorn and Nordend concerns the separation at apogee to release the parachute: whereas for Nordend the separtion mechanism was located between the AVB and the REB as shown below, the seperation for Firehorn takes place between the NSB and the PLB, similarly as for Wildhorn. This implies that the PLB is now directly linked to the shockplate.
Nomenclature/list of pieces:
For a better understanding of the final design, here is the final list of pieces with there associated nomenclatures for 3DX:
- 211201_Superior_Plate
- 211202_Inferior_plate
- 211203_Rods
You will also see us refer to a shockplate on which the parachute is fixed on one side and the PL is screwed to the other side. We decided to go for two identical shockplates (one on top of AVB and the one we will be refering to in this documentation) in order to ease the manufacturing phase.
Relevant requirements:
-
2024_C_SE_ST_NOSECONE_REQ_02 Nosecone declaration of purpose
The nosecone of the LV shall host the PL. -
2024_C_SE_ST_NOSECONE_REQ_04 Nosecone length
The nosecone shall have a length of [800][+/-20]mm. -
2024_C_SE_ST_NOSECONE_REQ_05 PL integration
The nose cone shall be able to integrate a PL of the CubeSat standard [RD01] within the 3U format. -
2024_C_SE_ST_NOSECONE_REQ_06 Connection to REB
The nosecone shall be attached to the RE bay via a seperation mechanism located on the lower nosecone end. -
2024_C_SE_ST_NOSECONE_REQ_07 Nosecone structure mass
The total mass of the Nosecone structure shall be [4800][+/-480]g.
EuRoC requirements:
One final important fact to keep in mind is that for EuRoc, the PL must be weighed, which implies that either the top or the bottom of the PLB must be easily removable and the PL must be completely detached from anything. Since the diameter is smaller for the Nosecone Tip, the PL must be removed from the bottom of the PLB.
¶ Design Options
Since Nordend's PLB had to deal with extreme dimension and weight constraints, it design is simple but very efficient. We therefore decided to start by analyzing it. Since the rods where only glued to the inferior plate and the superior plate we came up with a design in which they are screwed together (see Design Option 2).
The first design option is a scale up of Nordend's PLB with the difference that the fixation plate of the PL is directly the shockplate since as mentionned, the separation on Firehorn takes place between REB and NSB. All the other pieces have the same functions and are similar to Nordend's ones.
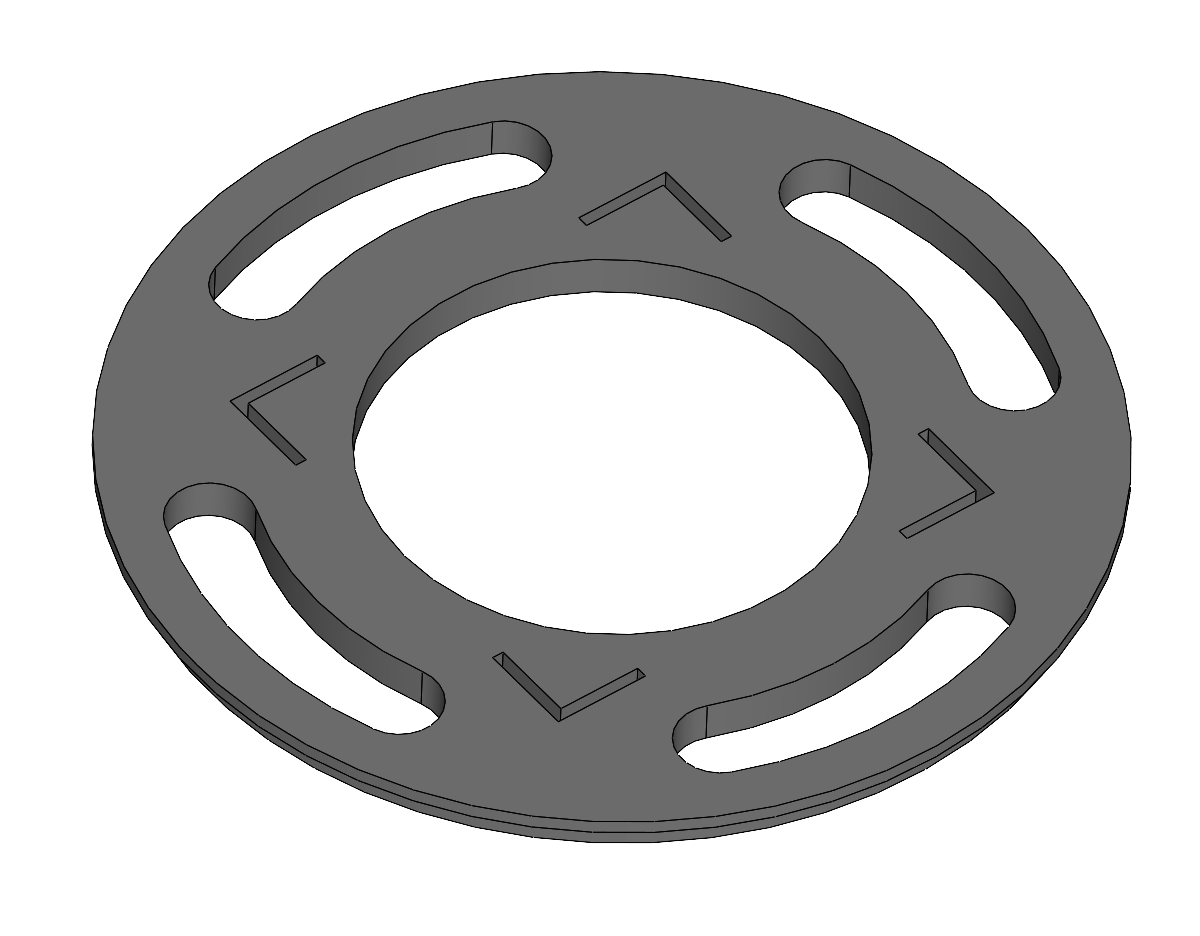
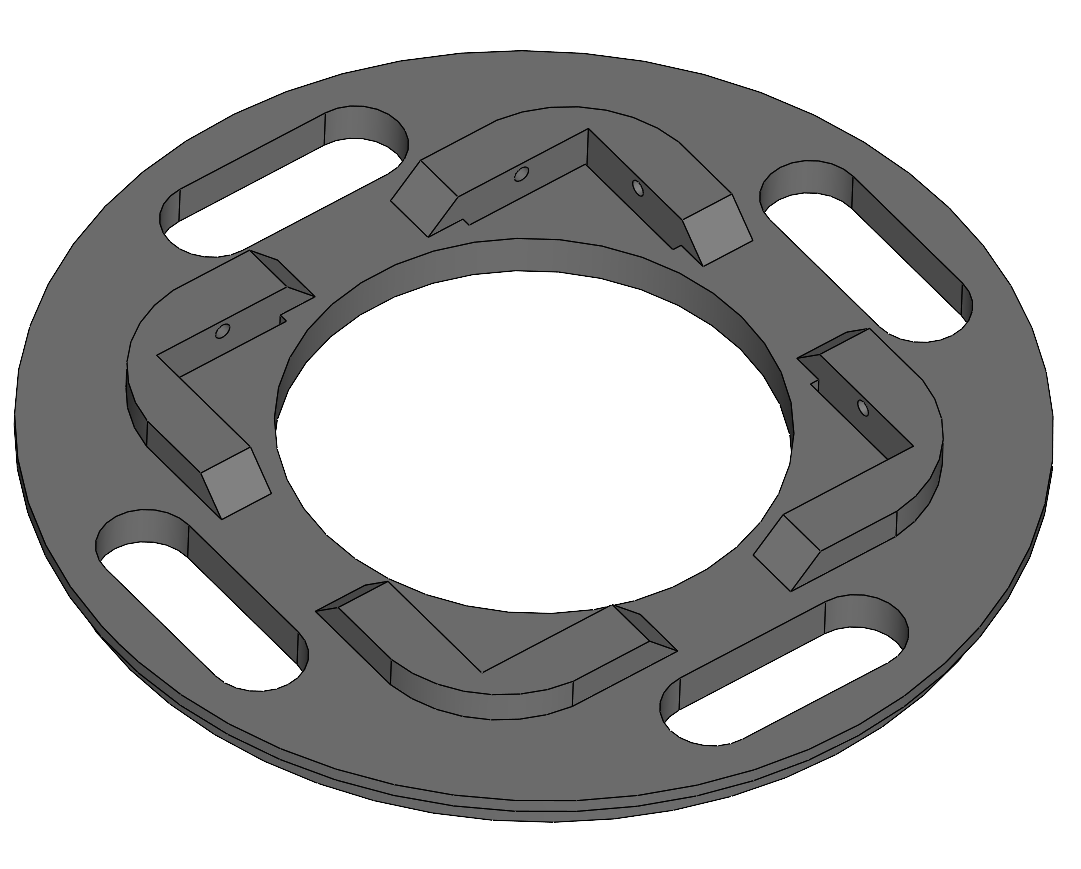
Superior Plate
The Superior Plate would be 3D printed in Nylon since it takes barely no charges. It is glued on it's exterior to the NSB and the rods are glued on it's inside. Note the holes to reduce weight and the edge for the glue. The z direction goes into the paper
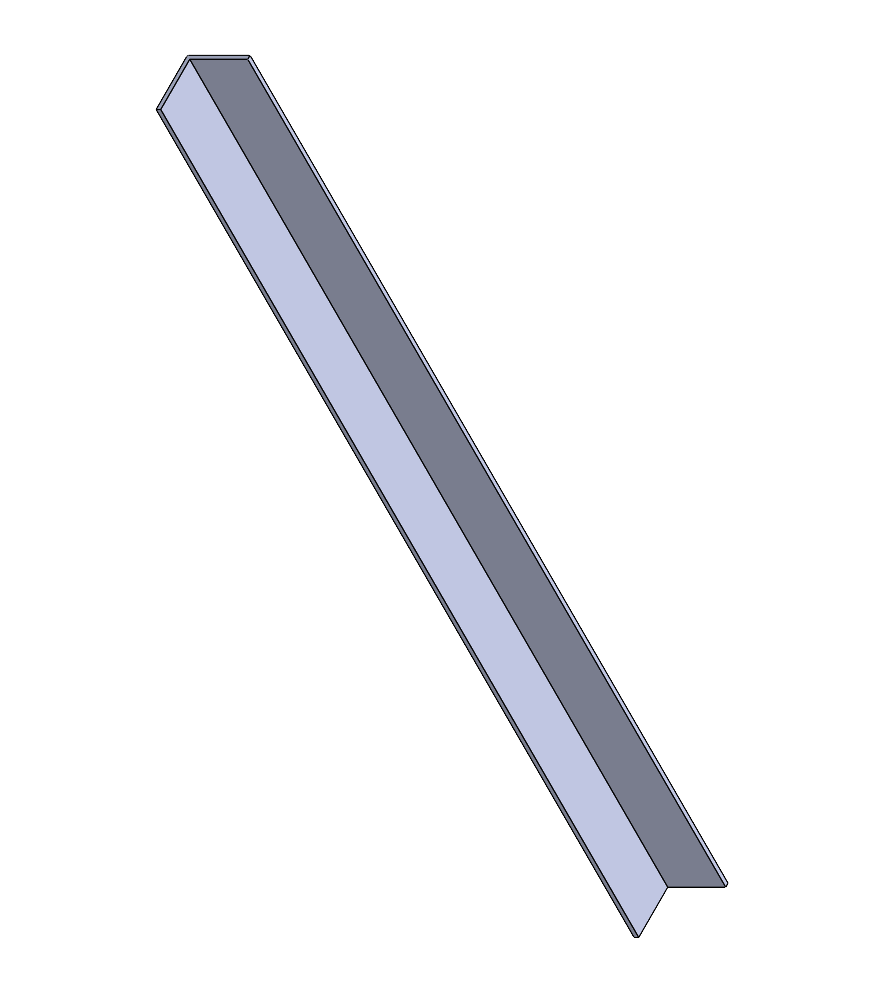
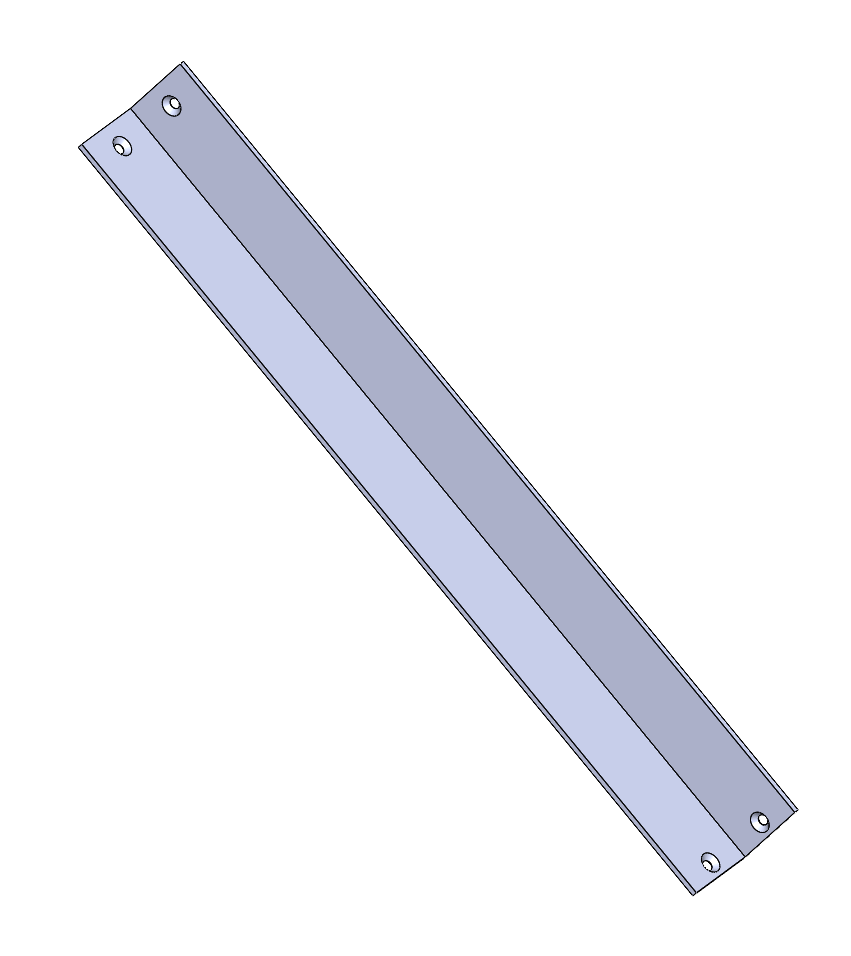
Rods
The rods are angular profiles in aluminium found at OBI Shop (20x20x1,5mm) to reduce costs.
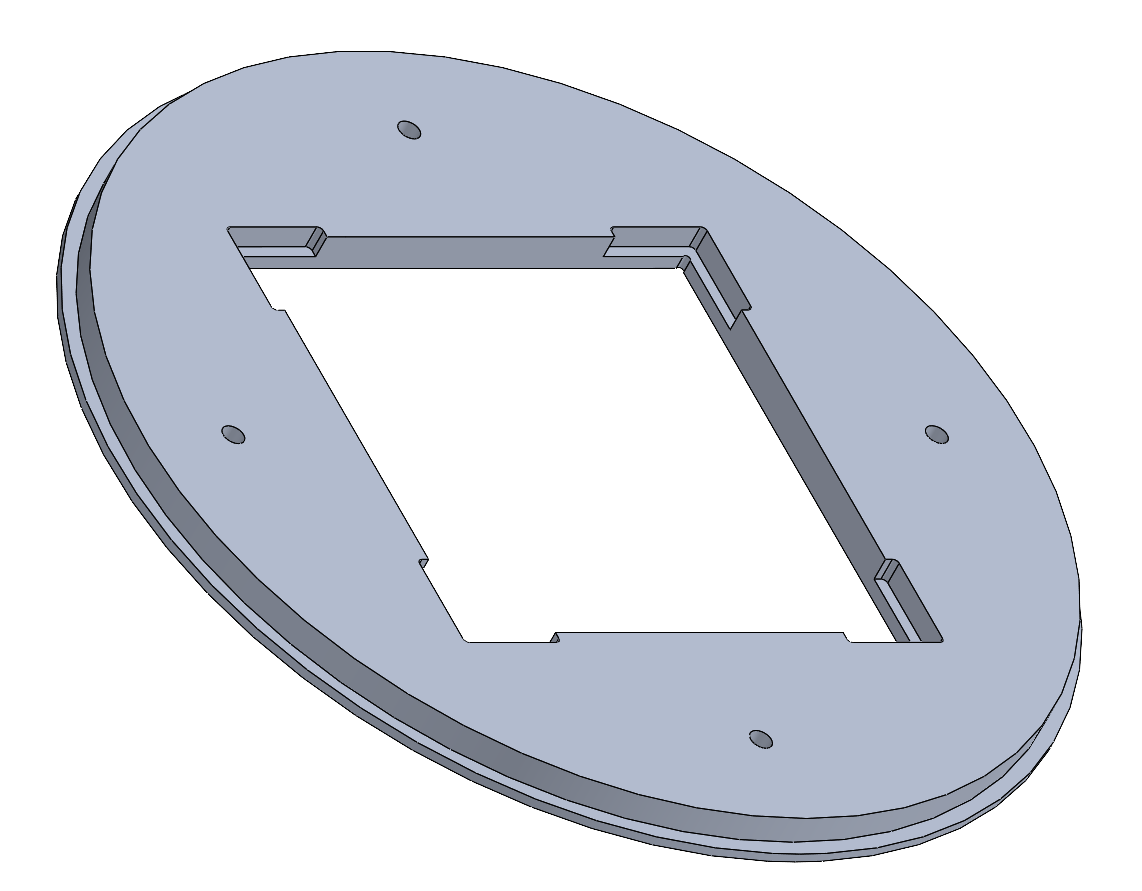
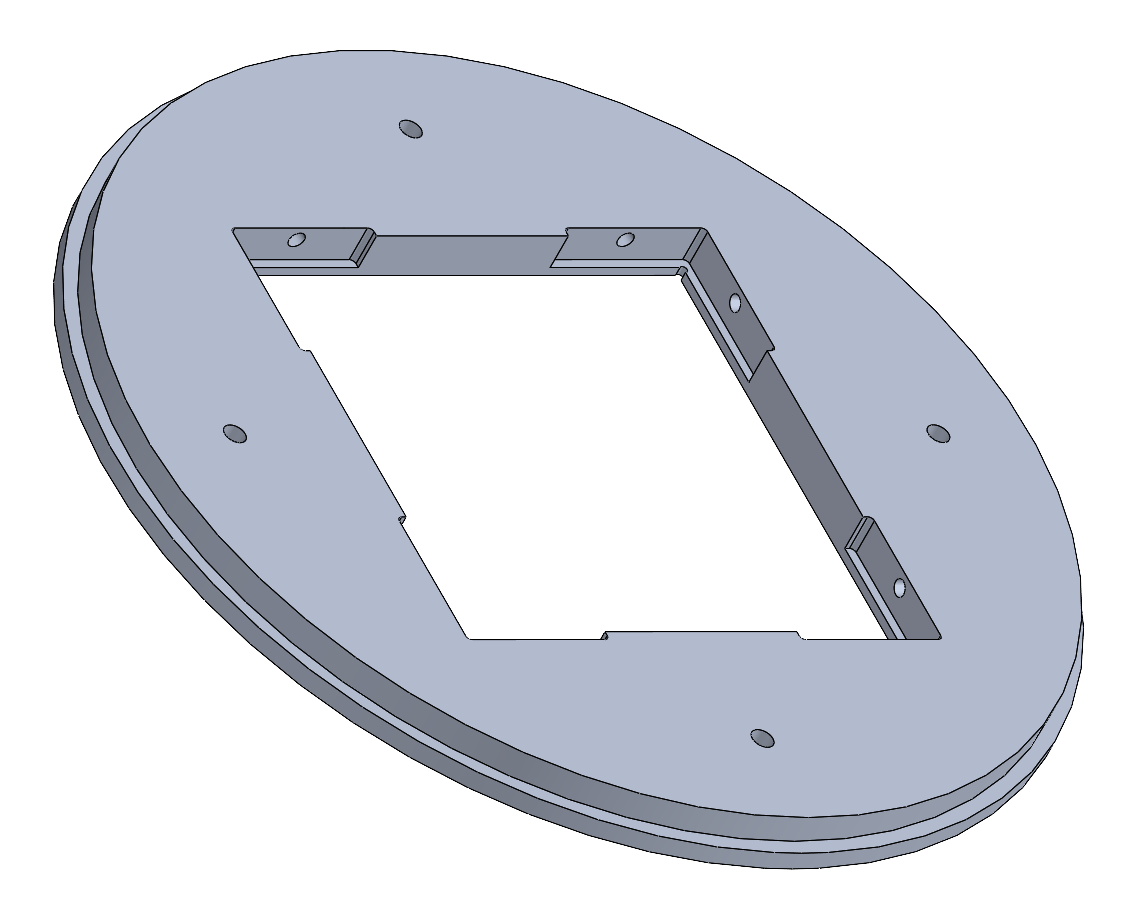
Inferior Plate
The Inferior Plate would be made out of aluminium (Al 6082 T6) and not 3D printed since it is directly screwed to the shockplate. It is glued on it's exterior to the NSB and the rods are glued on it's inside. Note the edge for the glue.
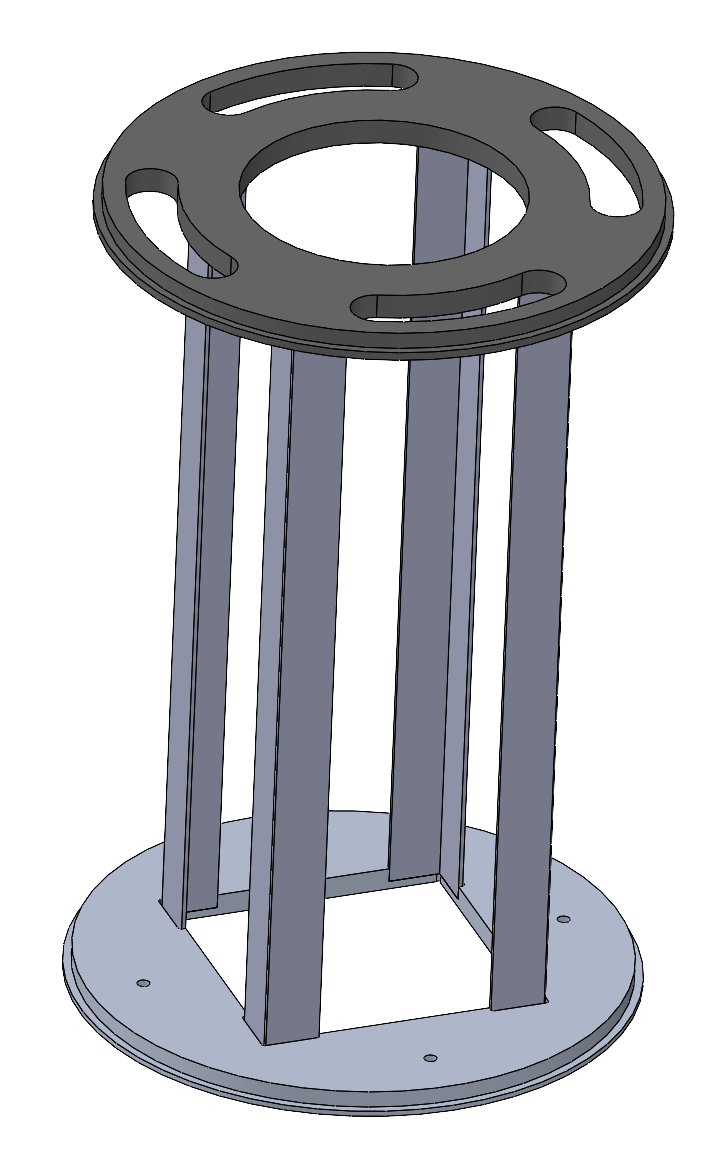
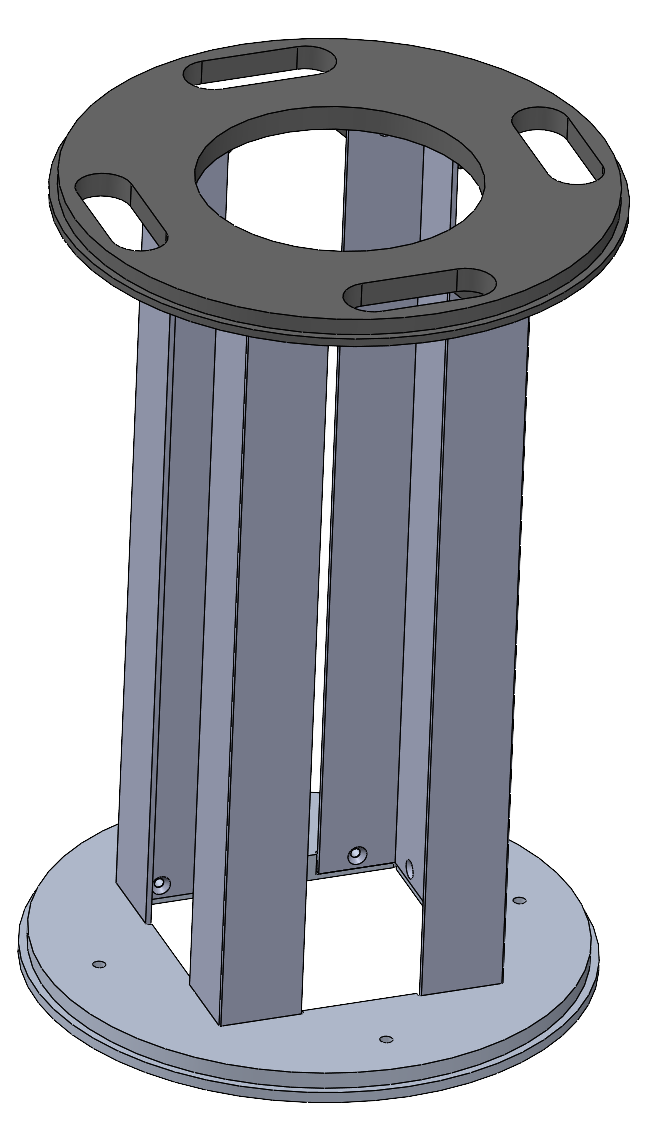
The assembled PLB without the shockplate for this design would look like this:
Main Advantages: very light, doesn't need any screws
Main Disadvantages: only glued
This second design is the improved version of Nordend's PIS. It has the same pieces as the Design Option 1 but with slight improvments, especially concerning the intergation of the different parts. To avoid having to glue the Rods to the SP and inferior plate, we clamped the rods and added holes to screw them to the Superior Plate and Inferior Plate.
Superior Plate
The Superior Plate would be 3D printed in Nylon since it takes barely no charges. It is glued on it's exterior to the NSB and the rods are screwed to it's inside. Note the holes to reduce weight and the edge for the glue. The z-direction goes into the paper.
Rods
The rods are angular profiles in aluminium found at OBI Shop (30x30x2mm) to reduce costs.
Inferior Plate
The Inferior Plate would be made out of aluminium (Al 6082 T6) and not 3D printed in Nylon since it is directly screwed to the shockplate. It is glued on it's exterior to the NSB and the rods are screwed to it's inside. Note the edge for the glue.
The assembled PLB without the shockplate for this design would look like this:
Main Advantages: solid assembly, no glue
Main Disadvantages: takes more time to assemble, heavier and more expensive
¶ Narrowing the Design Options
For simplicity of assembly and machining, the design in which the rods are glued to the superior and inferior plate seems to be the best choice.